A peace lily can go from glossy and graceful to looking scorched surprisingly fast. Black tips, dark edges, and collapsing leaves are clues, but they do not all call for the same fix.
Check the potting mix before you reach for more water or fertilizer—a thirsty plant and a plant with damaged roots can both droop. Here is how we sort through the likely causes, protect the healthy leaves, and judge whether the plant is recovering.
1. Check the Soil and Roots Before You Water Again

Start below the leaves. Push a finger into the potting mix and lift the pot to get a feel for its weight. Check whether water is sitting in the saucer or hidden inside a decorative outer pot.
A drooping peace lily in wet soil does not necessarily need a drink. When roots stay waterlogged, they lose access to oxygen and can deteriorate. Damaged roots cannot supply the leaves properly, even when there is plenty of water around them.
If the mix is wet, hold off on watering and empty any standing water. Make sure the inner pot has open drainage holes. A container much larger than the root ball can keep unused soil wet for too long.

If the plant keeps declining while the soil stays soggy, gently slide the root ball out of its container. Look for roots that are soft, slimy, easily broken, or foul-smelling. Texture matters more than color alone: a firm root stained by potting mix is not automatically rotten.
Where damage is limited, trim away clearly rotted roots with clean scissors and repot in fresh, well-drained houseplant mix. Choose a clean pot that fits the remaining roots; removing roots is not a reason to move into a larger container. A mushy crown or extensive root loss makes recovery much less likely.
The opposite problem can damage leaf edges, too. If the root ball is dry and the pot feels light, water slowly and thoroughly until water drains out. Let it drain completely. Water that races down the sides may leave a very dry center untouched, so check that the mix actually absorbed it.
Going forward, let the surface dry slightly between waterings while keeping the root zone lightly moist. Avoid both constant sogginess and repeated dramatic wilting. Check on a routine; water according to the soil. A weekly calendar cannot account for changing light, temperature, and growth.
2. Check Fertilizer, Water Quality, and the Plant’s Location

If the roots seem sound, think about what changed before the damage appeared. A stronger fertilizer dose, a new water source, an open window, or a move into afternoon sun can all matter. Several stresses can overlap.
Brown-black tips are not an invitation to add more plant food. Excess fertilizer salts can injure roots and burn leaf margins. A pale crust on the potting mix or container is a useful clue to salt buildup, although its absence does not rule it out.
Pause fertilizer while you investigate. If the roots are healthy and the pot drains freely, run plain water through the mix at a sink and let the runoff escape. Do not leave the pot soaking in that runoff, and do not try to flush a waterlogged, rotting root ball.
If you have been using water from a household softener, switch sources. For persistent tip damage, distilled or reverse-osmosis water is worth trying while you correct the watering routine. Simply leaving tap water in a jug overnight does not remove dissolved mineral salts.

Cold injury can begin at the tips and edges and spread inward as blackened tissue. Think about a chilly trip home, leaves touching winter glass, or a plant caught between a window and a closed curtain. Damage may become visible after the cold exposure has ended.
Move the plant to a stable, comfortably warm spot away from cold drafts and heating or cooling vents. Avoid temperatures below about 60°F. Different peace lily varieties tolerate chilling differently, so one plant’s survival on a cold windowsill is not a reliable rule for another.
Strong direct sun can also scorch foliage. Check whether the most damaged leaves face the window or whether the plant was recently moved into brighter light. Choose bright, indirect light, using a sheer curtain or a position farther from harsh sun when needed.
Dry indoor air and repeated drying can contribute to crispy tips. A humidifier may help in a dry room, but it cannot repair waterlogged roots. Once the plant is growing well again, resume modest feeding according to a suitable houseplant fertilizer’s directions rather than trying to force a quick recovery.
3. Remove Dead Tissue and Watch What Happens Next

Blackened leaf tissue will not turn green again. Correcting the cause protects what is still alive and gives future leaves a better chance. Cutting off every imperfect leaf can leave a struggling plant with very little working foliage.
For a small, dry tip, trimming is optional. Use clean scissors and follow the leaf’s outline, staying just inside the dead area. If most of a leaf has died, remove its stalk close to the base without cutting neighboring stalks or the growing crown.
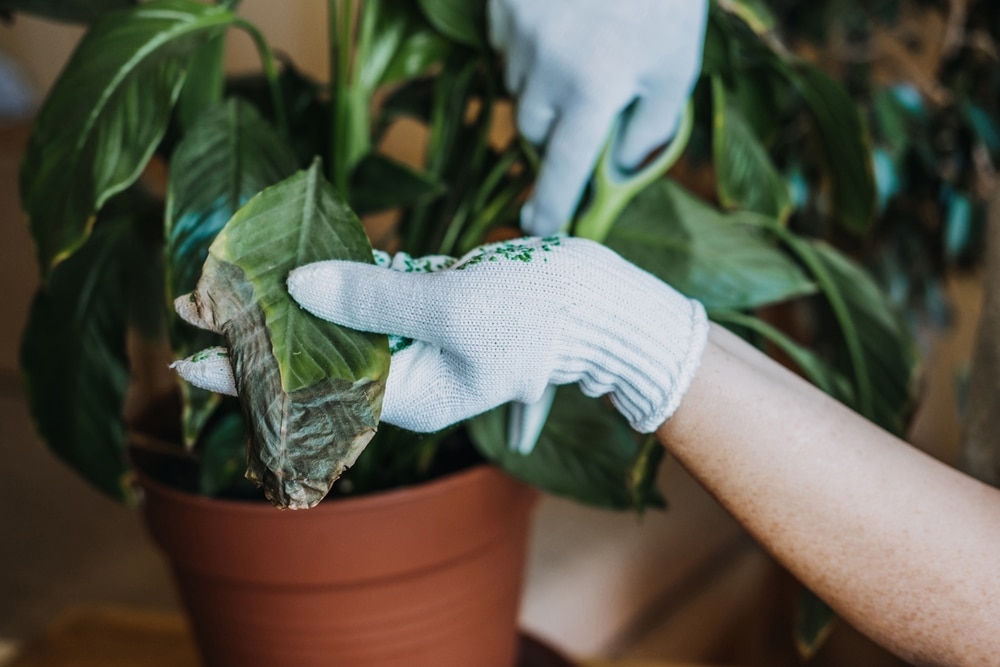
Bag discarded leaves promptly and clean your tools, especially if disease is suspected. Keep the plant and its trimmings away from pets and small children; chewing peace lily tissue can cause painful mouth irritation.

Check that the darkening part is actually a leaf. The familiar white “flower” is a modified leaf called a spathe surrounding the flower-bearing spike. An aging spathe can turn green and later brown without signaling that the whole plant is failing.
Spreading brown or black spots deserve a closer look, particularly when patches appear water-soaked or new leaves become affected. Set the plant apart from other houseplants, avoid splashing its foliage, and allow air to circulate around it. A photograph alone cannot reliably identify a fungal or bacterial disease.
If spots keep spreading or the crown becomes soft, seek a diagnosis before spraying. Your local Extension office or a plant diagnostic service can use the plant’s history and, when needed, a sample. A general-purpose spray will not fix cold injury, fertilizer burn, or every kind of infection.
Take a clear photo now and compare the plant over the next few weeks. Look for firm stalks, stable damage boundaries, and new leaves that remain healthy as they mature. Judge progress by those changes—not by whether an old black tip disappears.
References
- Clemson Cooperative Extension: Peace Lily
- University of Florida IFAS Extension: Cultural Guidelines for Spathiphyllum
- University of Florida IFAS Extension: Chilling Injury in Spathiphyllum
- Iowa State University Extension: Diagnosing Houseplant Problems
- Iowa State University Extension: Problems Related to Poor Culture
- Iowa State University Extension: Problems from Improper Environmental Conditions
- Iowa State University Extension: Houseplant Diseases
- University of Maryland Extension via Ask Extension: Brown Leaves on Peace Lily
- North Carolina Extension Gardener Plant Toolbox: Peace Lily
Image Attributions
Featured graphic: Gardening Wins artwork supplied by the publisher. Leaf inspection photograph: “Peace Lily Leaves Turning Black”, reused from the GFL Outdoors media library. Commons photographs below are resized for display, with no cropping added. They illustrate plant appearance; they are not confirmed examples of a particular diagnosis.
1. Check the Soil and Roots Before You Water Again
- “Spathiphyllum wallisii2.jpg” by Deyvid Setti. Rights: Public domain dedication by the copyright holder.
- “Spathiphyllum wallisii 2015 (1).jpg” by DAR7. Licensed under CC BY-SA 4.0.


.jpg)
2. Check Fertilizer, Water Quality, and the Plant’s Location
- “Maseta.jpg” by CesarAlbertoHerrera. Made available under CC0 1.0.
- “Peace Lilies (418535039).jpg” by Dinesh Valke. Licensed under CC BY-SA 2.0.

.jpg)
3. Remove Dead Tissue and Watch What Happens Next
- “Espatifilo.JPG” by Rosina Peixoto. Licensed under CC BY-SA 3.0.
- “Peace lily 001.jpg” by Sardaka. Made available under CC0 1.0.

