That clematis covering your trellis may be the start of your next plant, not another trip to the nursery. A healthy stem cutting can grow into a new clematis with the same characteristics as its parent.
The trick is choosing suitable growth, keeping a leaf joint intact, and preventing the cutting from drying out before roots develop. You do not need a greenhouse, but you do need patience—and a little attention to the details.
1. Choose the Right Shoot Before You Reach for the Snips
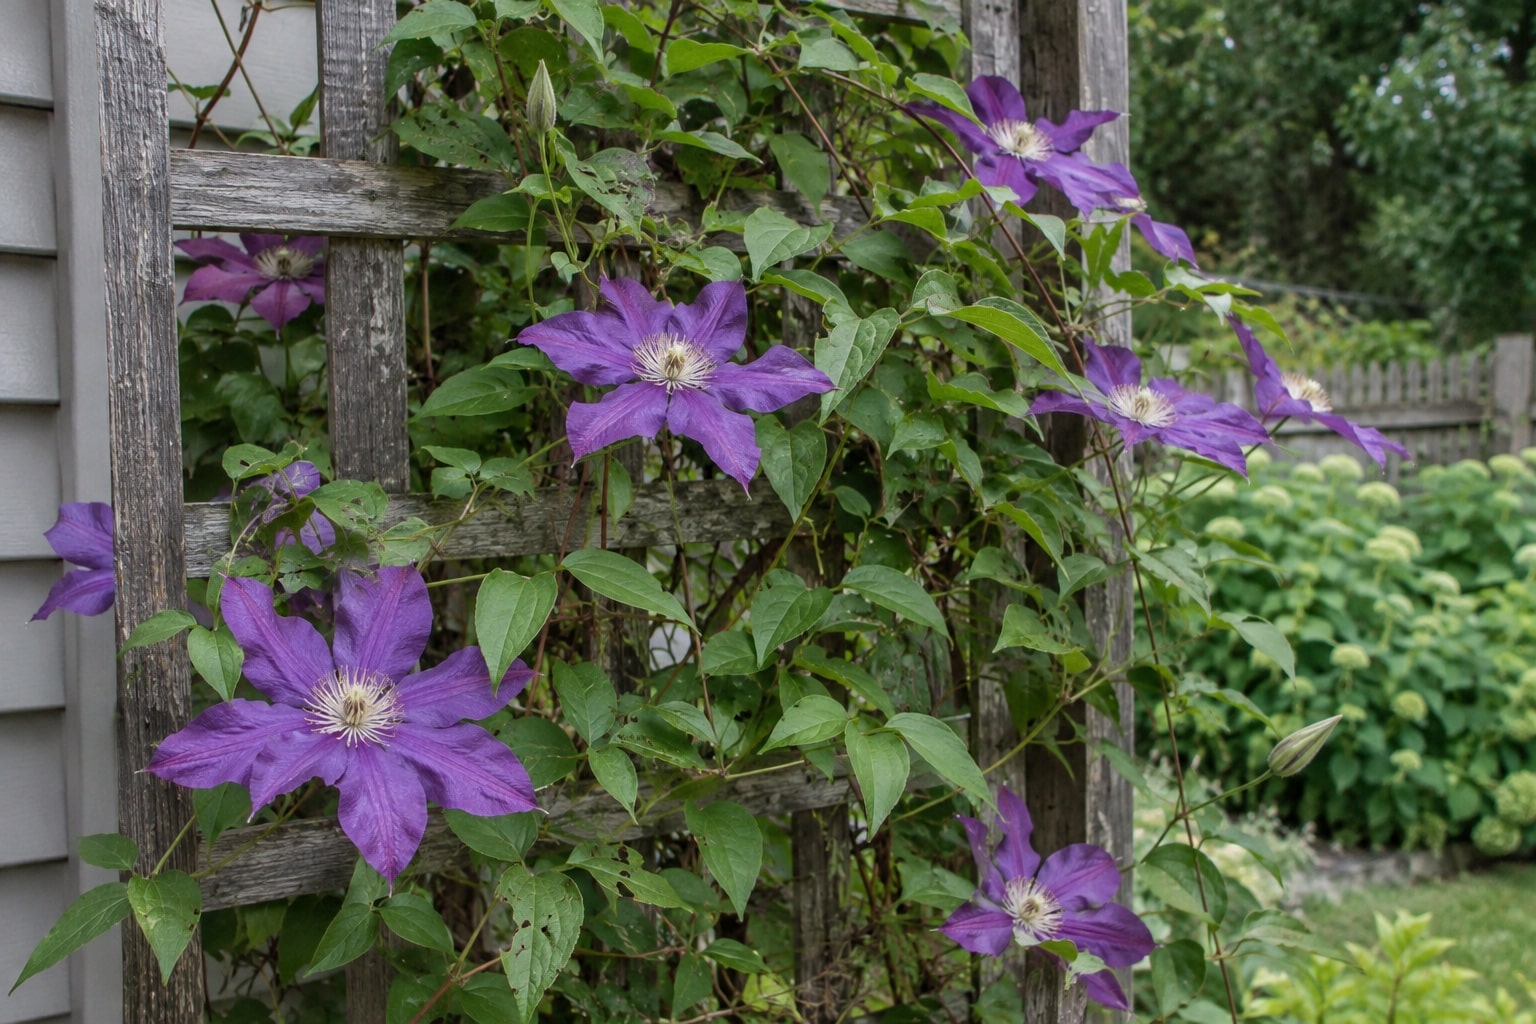
Start with a clematis you already know and want more of. Cuttings preserve a named variety; seed may not. Seedlings from large-flowered hybrids can look quite different from the parent, which makes seed sowing an experiment rather than a dependable way to repeat your favorite flower.
Check the plant label first, too. In the United States, an active plant patent can restrict propagation, even for your own garden. Confirm that your variety is not protected or obtain permission from the rights holder before taking cuttings. If the plant belongs to someone else, ask the owner as well.
For the softwood method described here, look for vigorous new growth in spring or early summer. The British Clematis Society recommends the middle of a growing vine: the very tip can be too tender, while the base may already be woody.
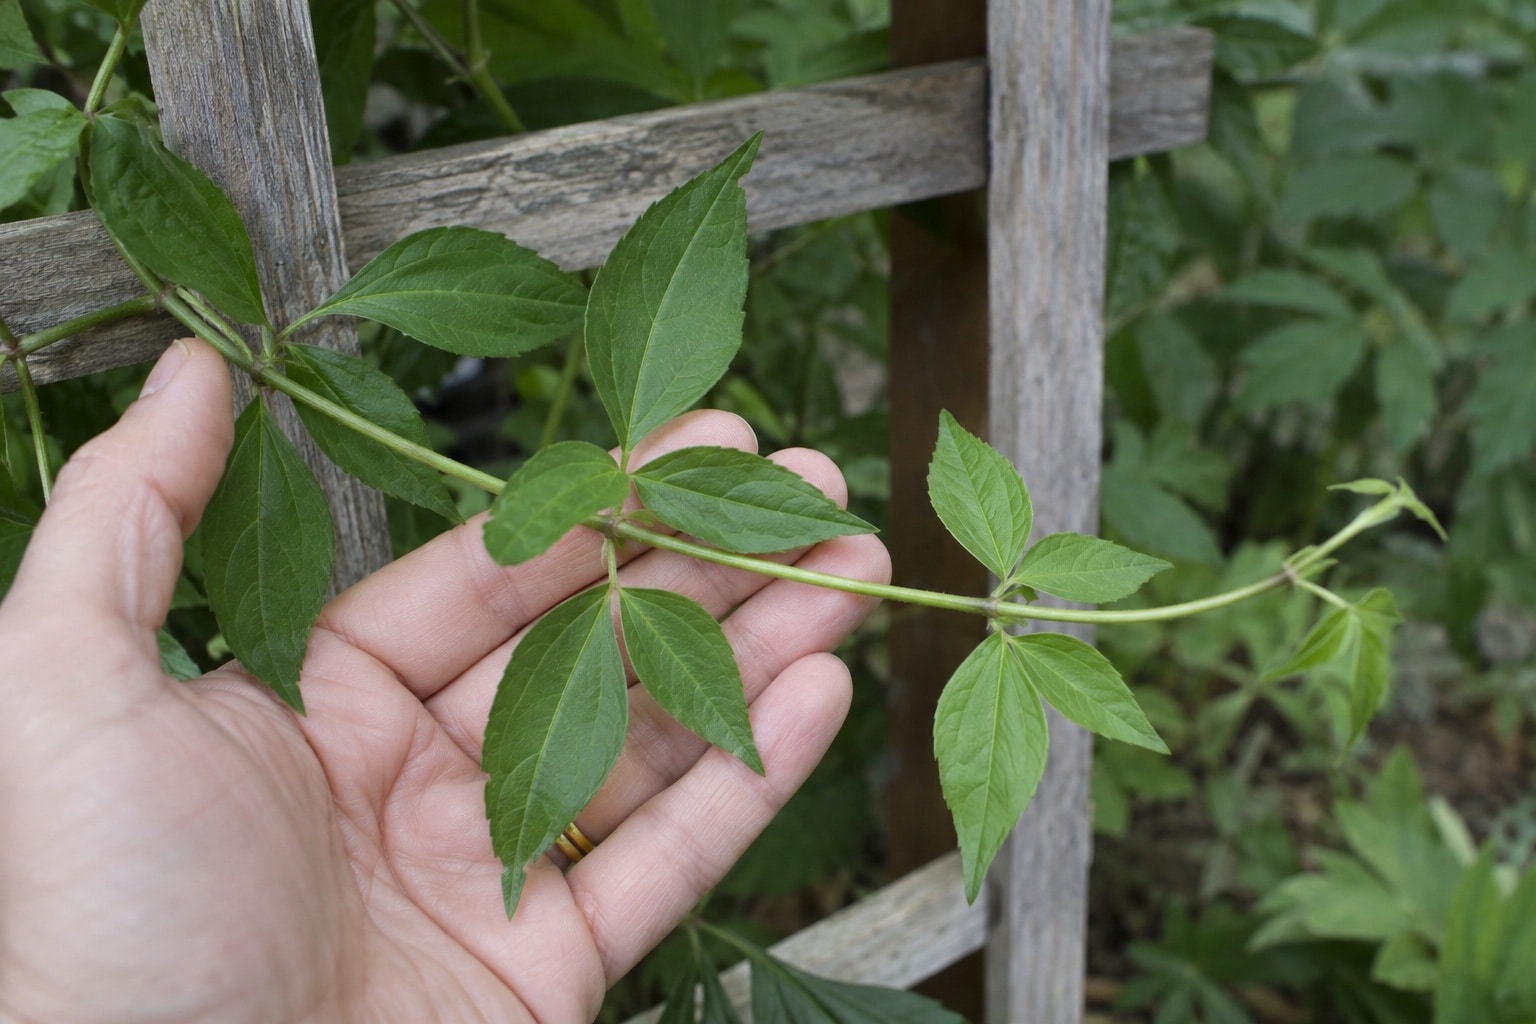
Choose a healthy, non-flowering shoot with green leaves and a firm but still flexible stem. Pass over wilted, damaged, pest-infested, or blackened material. A cutting starts with the condition of its parent; propagation is not a cure for a sick vine.
Later-season cuttings are possible, but they are not the same as soft spring growth. RHS guidance includes firmer, current-season material through late summer. Follow the condition of the shoot, not a calendar date alone. If your vine is shutting down for winter, waiting for fresh growth is a more sensible beginner project.
Water the parent plant the evening before if needed, and collect your shoot during the cool part of the morning. Put it straight into a clean plastic bag and prepare it promptly in shade. Do not leave it on a sunny table while you hunt for pots.
Have clean, sharp snips, a small pot with drainage holes, fresh propagation mix, a label, and a clear bag or propagator ready. Taking several suitable cuttings gives you a small batch to work with; not every cutting will root.
2. Keep the Leaf Joint—and Prepare a Small, Clean Cutting

Find a node: the joint where leaves attach to the main stem. The smooth stretch between two nodes is an internode. For this clematis method, the cutting keeps one node near its top and a short length of bare stem underneath.
Using a sharp blade or fine snips, cut immediately above the chosen leaf joint. Make the lower cut about 1¼–1½ inches (3–4 cm) below that same joint, in the stem between nodes. Keep the joint itself undamaged. You are making a small leaf-bud cutting, not planting an entire long runner.
Remove the leaf on one side. Retain foliage on the other, reducing an especially large leaf or excess leaflets if necessary. This limits moisture loss while leaving some leaf area. Keep the tiny bud at the leaf joint intact; a detached leaf is not a substitute for this stem cutting.
Rooting hormone can help some cuttings establish. If you use it, follow the product label for the plant and cutting type. Put a little powder in a separate container, treat the stem base as directed, and tap away excess. Do not dip into the main supply or return used powder to it.
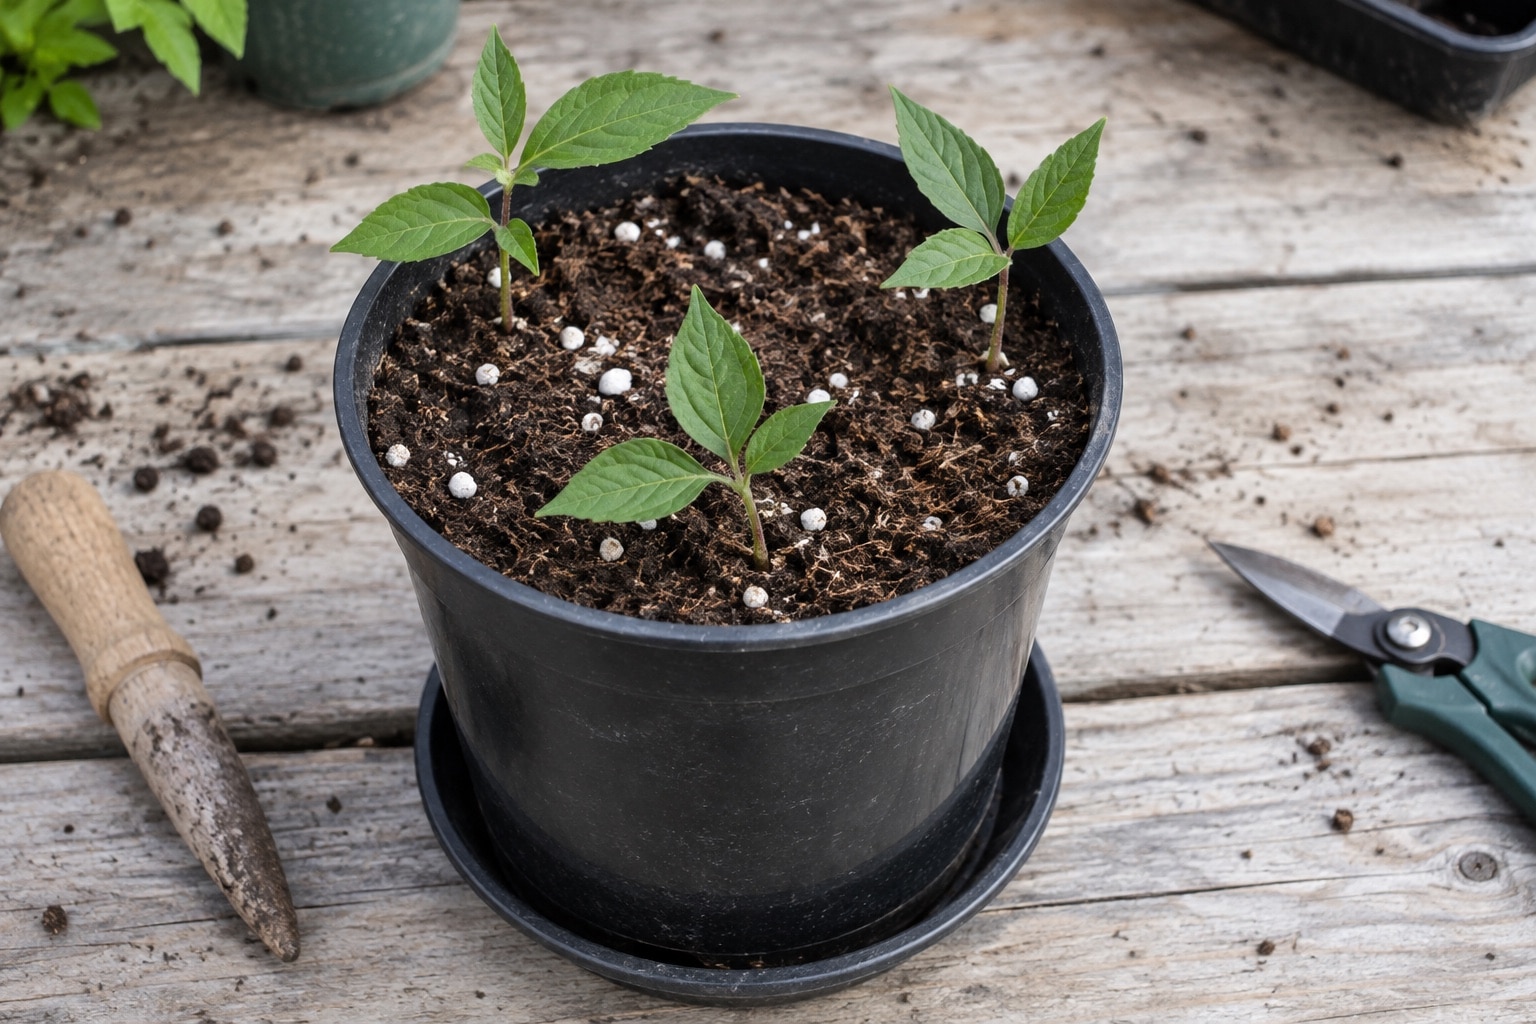
Use a fresh, fine-textured propagation mix that holds moisture while draining freely. A commercial seed-and-cutting mix with an airy component such as perlite is a convenient choice. Heavy garden soil and a pot without drainage are poor substitutes. New roots need oxygen as well as moisture.
Moisten the mix and let excess water drain. Make a small planting hole with a dibber, lower in the bare stem, and gently firm the mix around it. For this short cutting, position the leaf joint at approximately the surface, with foliage above the mix.
You can space a few cuttings around a small pot, but give each leaf room instead of cramming them together. Water gently to settle the mix, let the pot drain, and empty the saucer. Label it with the variety and date now—several pots of green leaves become surprisingly hard to tell apart.
3. Give the Cutting Humidity, Then Time to Become a Plant
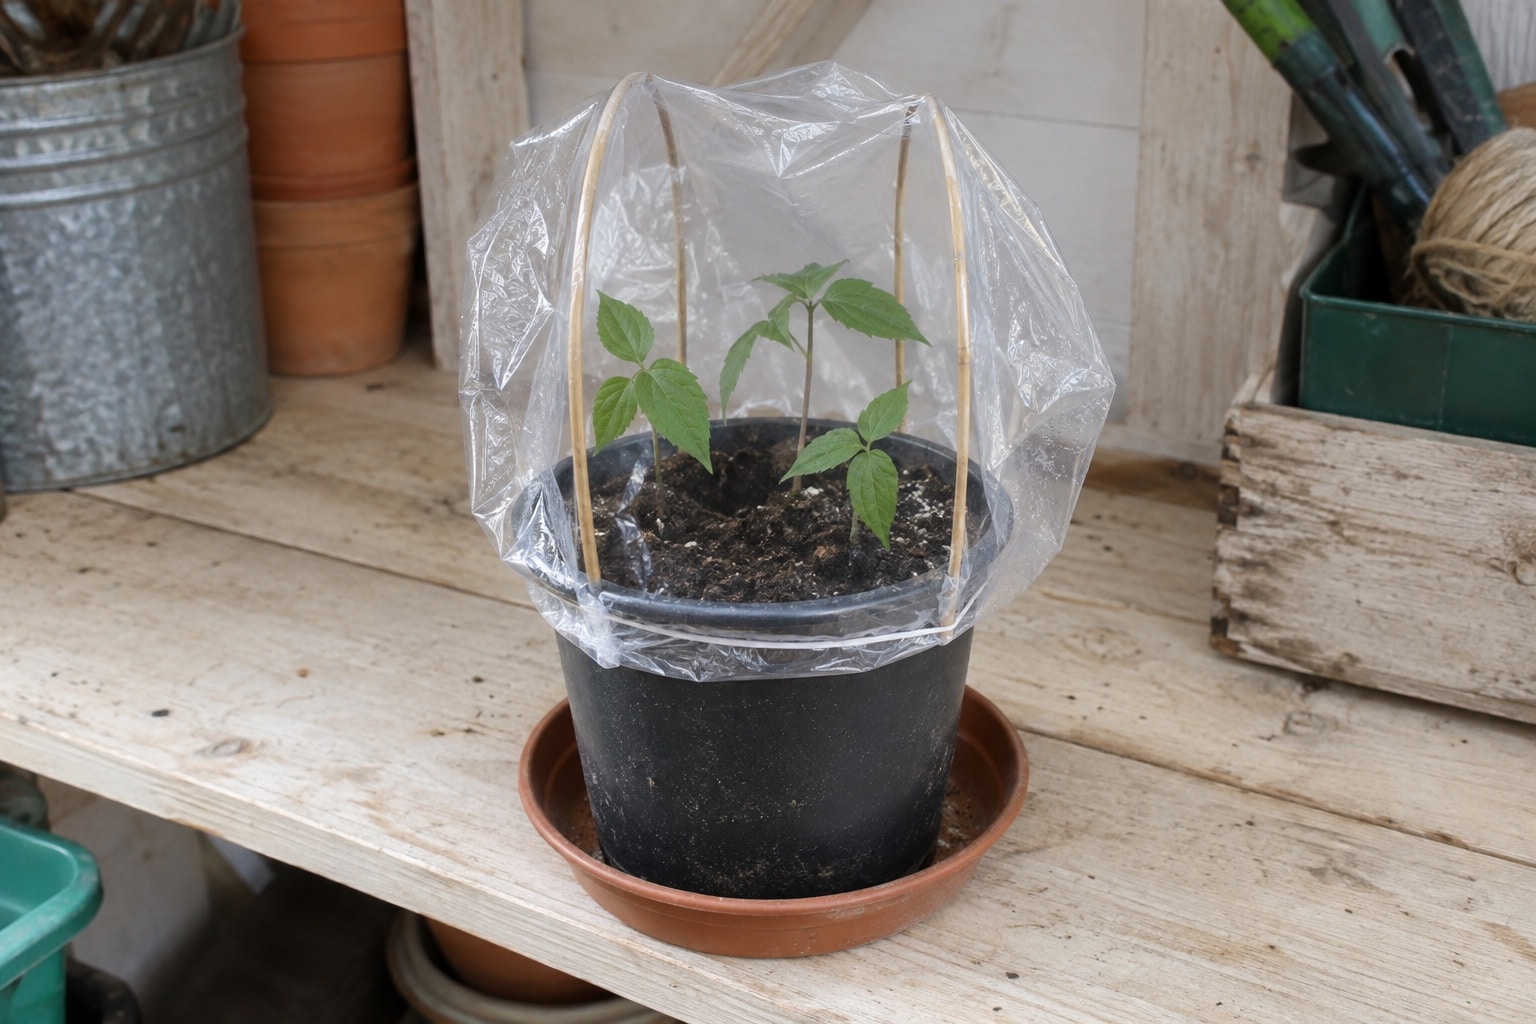
The immediate job is to slow water loss while the cutting has no working roots. Cover the pot with a clear bag held away from the leaves by supports, or use a propagator. Place it in bright, indirect light—not direct sun. A sunny windowsill can overheat a covered pot.
Check daily. The mix should stay damp, not saturated, and the pot should never stand in water. Briefly open the cover to inspect the cuttings and allow air exchange; remove fallen leaves and any rotting material. Persistent heavy condensation or mold is a reason to reassess moisture and ventilation, not add more water.
Warm conditions help, but a heat mat is not compulsory. Keep the setup away from cold drafts, and do not turn it into a sealed, baking-hot miniature greenhouse. Humid air and waterlogged roots are two different things.
Expect a wait measured in weeks. RHS guidance gives about six to eight weeks under suitable conditions; some cuttings root sooner and others take longer. Variety, shoot maturity, temperature, and care all affect the result. A new leaf alone is not proof of a substantial root system.
Avoid repeatedly pulling cuttings out to look underneath. Roots appearing at drainage holes are a useful sign, but the goal is a well-rooted little plant—not one fragile root. Once established, gradually increase ventilation rather than removing the cover abruptly.
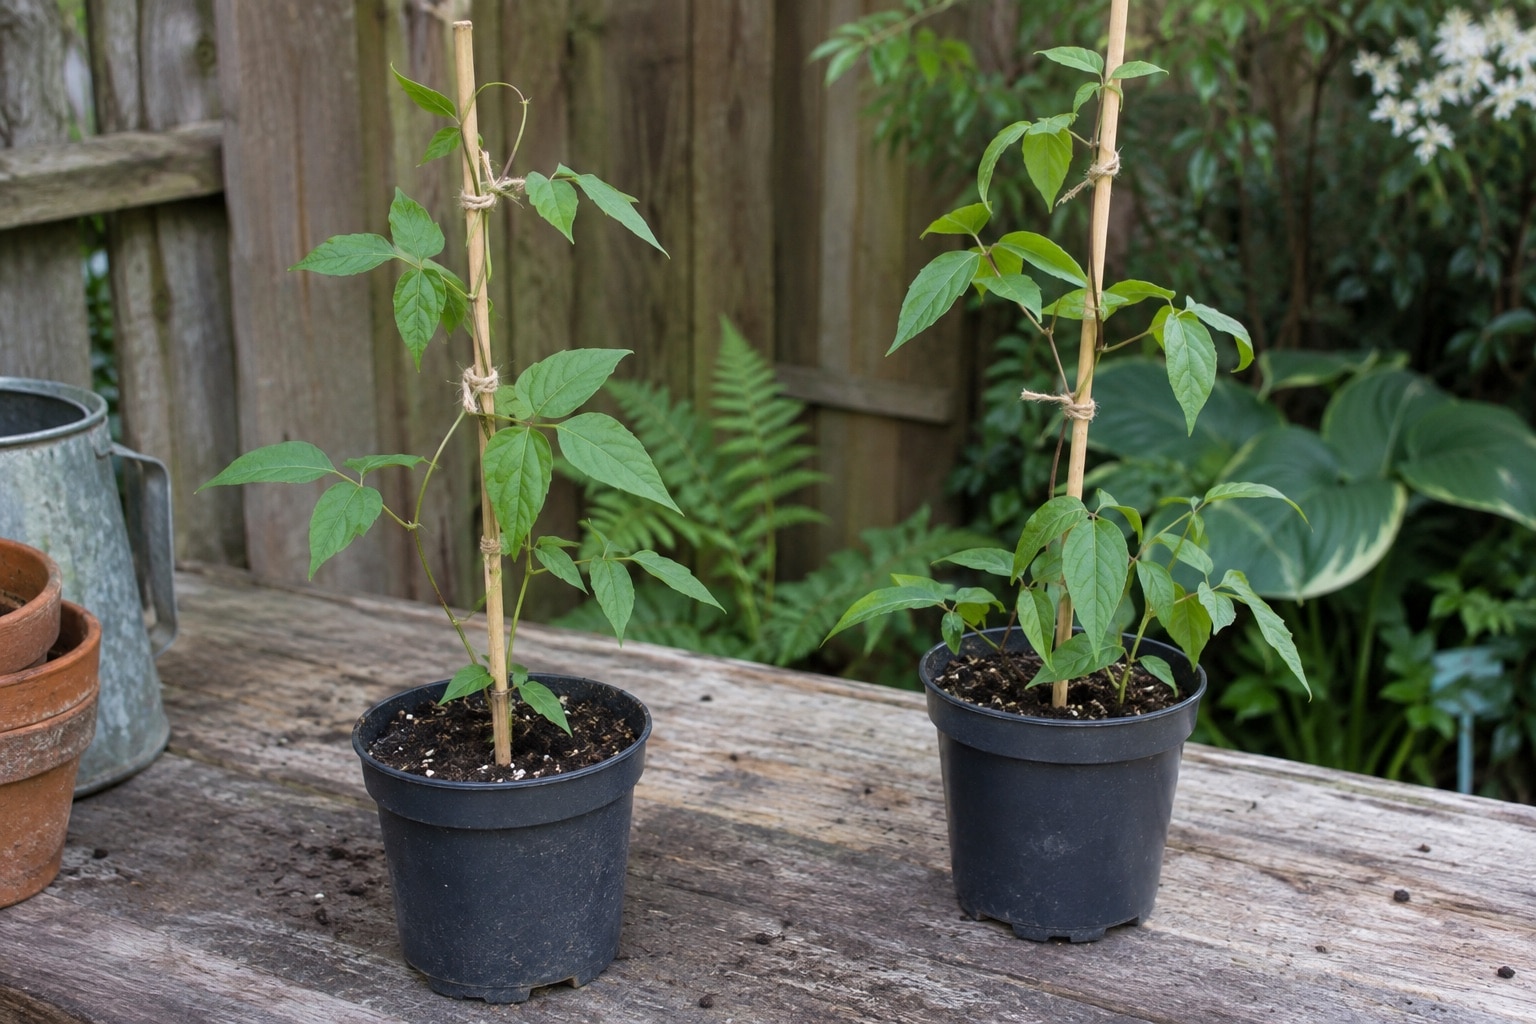
Pot rooted cuttings individually into suitable potting mix and give each climbing plant a slender support. Grow them on before planting them in the garden. NC State Extension advises against moving freshly rooted cuttings straight into the landscape; a larger, better-established plant has a stronger start.
For later batches, waiting until spring to separate and pot them may be the better choice. Protect young plants from winter freezes using a setup appropriate to your local climate; an unheated greenhouse that works in a mild area may be inadequate in a severe winter.
Before the plants move outdoors permanently, acclimate them gradually to outdoor light and air over roughly two to three weeks. Start sheltered, not in drying wind or harsh afternoon sun.
RHS guidance suggests flowers may arrive within about two years, although performance varies. Do not rush a tiny cutting into the ground just because it has stayed green. Keep the label, keep it growing, and let a strong root system earn its place on the trellis.
References
- Royal Horticultural Society: How to Grow Clematis — Clematis propagation, timing, rooting expectations, and growing on.
- British Clematis Society: Growing From Cuttings — Softwood selection, cutting dimensions, leaf reduction, and placement. This article does not adopt the older guide’s routine fungicide-dip advice.
- Royal Horticultural Society: Climbers—Taking Cuttings — Humidity, drainage, hygiene, overwintering, and acclimation.
- NC State Extension: Extension Gardener Handbook, Chapter 13—Propagation — Rooting media, stem and leaf-bud cuttings, and moisture management.
- NC State Extension: Plant Propagation by Stem Cuttings — Rooting-hormone hygiene and growing rooted cuttings before landscape planting.
- N.C. Cooperative Extension, Henderson County: Create Your Own Plants From Cuttings — Collection, daily inspection, rooting, and winter protection.
- British Clematis Society: Growing From Seed — Why hybrid seedlings may differ from the parent.
- United States Patent and Trademark Office: General Information About Plant Patents — U.S. plant-patent rights and asexual reproduction.