The Sago Palm is a wonderful ornamental plant to have around the house, with its palm fronds and festive appearance brightening up the landscape. Over time though, you’ll want to know how to trim sago palm trees to keep them looking neat and healthy.
How to Trim a Sago Palm

Growing sago palms is fairly easy, but you’ll need to ensure your plant is in a good location and is watered and trimmed regularly. Here’s a short, step by step guide on how to give your plant a nice trim.
Step 1. Trim in Late Fall or Early Spring
The best time to trim a sago palm is during the autumn or late fall season, which is the end of the palm tree’s growing period. When done this way, you reduce the amount of stress your sago plant receives, and you won’t accidentally cut out new or healthy leaves.
Alternatively, you can give your sago palm a trim in early spring when the risk of frost has passed to freshen it up. Palm varieties are susceptible to frost, and your sago plant might have a yellowed frond or two as a result of freezing temperature.
Step 2. Prepare the Equipment and Wear Protective Clothing
Once you have decided that you want to give your sago palm a trim, then it’s time to prepare the equipment. For trimming sago palm it’s recommended that you use sharp pruning shears or a clean knife to separate the tough fronds from the trunk.
Wear gloves, a long-sleeved shirt, and goggles before you trim or handle your sago palm. The long leaves are sharp enough to cut, and the sago palm’s trunk features spiky spines that can cause injury. Keep your pets or children away while pruning a sago palm as the parts are toxic when ingested.
Step 3. Trim Yellow and Brown Fronds First
The first step to trimming sago palm trees is to check for any diseased fronds and remove them using your knife or pruners. Give your plant a once-over to see if there are brown or yellowed leaves all around. They usually appear at the lower section and the base.
The correct way to trim a sago palm is to cut off the damaged and dying fronds as close to the trunk as possible. Furthermore, the cut should be flat, and there should be little or no sign that you cut off a frond in that section.
Cut in one smooth movement, if possible, to avoid further damaging the trunk and causing a wound to form.
Step 4. Focus on Crowded Areas
After removing old and yellowed foliage, it’s time to turn your attention to the aesthetics of your sago palm. Give it a once-over again, this time checking for overcrowded areas and where there are too many fronds.
Use your hand pruners or knife to remove the fronds, making sure to cut as close to the trunk and as flat as you can. As a general rule, you should not remove too many healthy fronds at once, or else you risk damaging your plant. Also, do not remove fronds that are in the 10 and 2 o’clock positions.
Step 5. Remove Cones and Pups
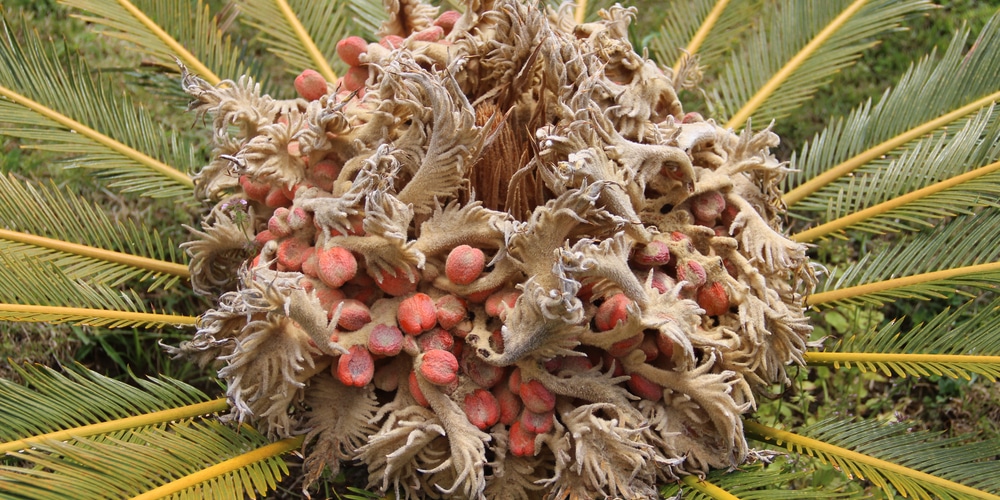
Cones or the sago palm’s fruit should be removed as soon as you see them. Use a pair of sharp scissors or garden shears when doing so, and make a clean cut to avoid further damage.
Pups or mini sago palm plants sometimes appear at the base of the tree. You can remove these small palms carefully and give them a new home when you’re trimming your sago palm. The offsets can be dug out using a hand trowel and propagated to form a new sago palm.
To propagate sago palm pups, remove all the leaves and lay them out for a week or two. Then, transplant in well-drained soil and position it so that only half the root ball is buried in the soil. Place in an area that gets bright and indirect light, and water only when the soil dries out.
Step 6. Give Your Sago Palm a Drink
Lastly, give your sago palm a good drink after trimming to reduce stress. You can give your plant a spritz of water from a hose, or spray the leaves to freshen up its appearance. You can also feed fertilizer that is made for sago palms if it’s spring season to boost its growth.