The “Short” Version
- Choose the Right Location: Squash plants need full sun, with at least 6 to 8 hours of direct sunlight each day. Select a spot in your garden that receives ample sunlight.
- Prepare the Soil: Squash prefers well-drained, fertile soil. Work in plenty of compost or well-rotted manure before planting to enrich the soil. The ideal soil pH for squash is between 6.0 and 6.8.
- Sow Seeds Properly: Plant squash seeds directly in the garden after the last frost when the soil has warmed. Plant seeds about 1 inch deep, in hills or rows. For vining varieties, space hills about 4 to 6 feet apart. For bush varieties, 2 to 3 feet apart is sufficient.
- Water Wisely: Squash plants need consistent moisture, especially during fruit development. Water deeply once a week, more often during hot, dry spells. Aim to water the soil directly, keeping foliage dry to avoid disease.
- Mulch and Weed: Apply a layer of mulch around your squash plants to retain soil moisture, regulate soil temperature, and suppress weeds. Keep the garden bed free of weeds that compete for nutrients and water.
- Pest and Disease Management: Regularly check plants for signs of pests and diseases. Use organic methods like handpicking pests or applying neem oil for control. Crop rotation and proper spacing can help prevent many diseases.
- Proper Fertilization: Squash are heavy feeders. Apply a balanced fertilizer at planting time and side-dress with a nitrogen-rich fertilizer when the first fruits are about the size of a marble.
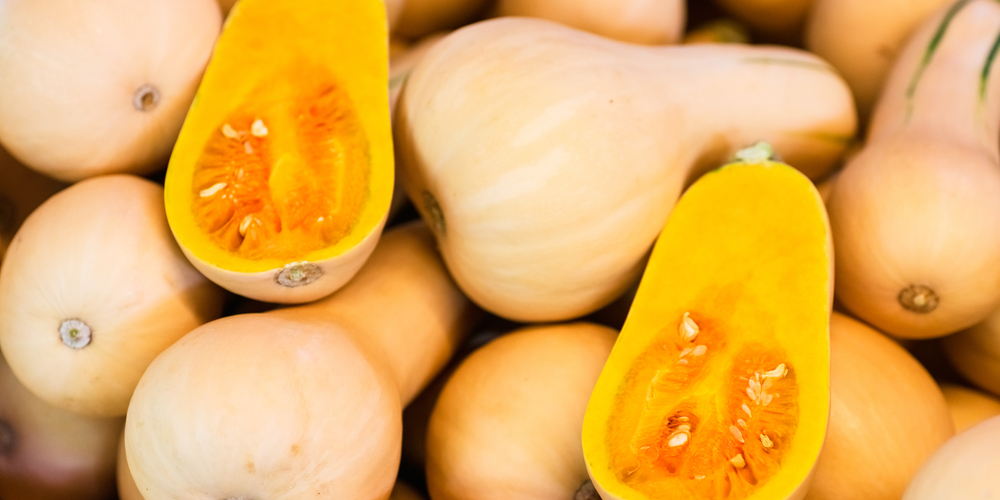
- Harvesting: Harvest summer squash when they are small and tender, usually 6 to 8 inches long. Winter squash should be harvested when the rind is hard and fully colored. Use a sharp knife to cut the stem, leaving a few inches attached.
Optimal Planting Times for Squash


To achieve bountiful squash yields, one must sync planting with the intricacies of the local climate and the garden’s seasonal rhythms.
Understanding Plant Hardiness Zones
The United States is divided into USDA Plant Hardiness Zones, which guide gardeners on when to plant specific crops. For squash, one should plant after the threat of frost has passed.
Typically, this coincides with the following timeline per zone:
- Zones 2-4: Mid-May to early June
- Zones 5-6: Late April to May
- Zones 7-8: Early April
- Zones 9-10: February to March
Plant Hardiness Zones provide crucial information regarding the first and last frost dates, which are imperative for planning the planting of squash.
One can consult a local extension office or utilize online resources to determine the precise timing for their zone.
Seasonal Considerations for Squash
Gardeners must also factor in the variety of squash they intend to grow.
Winter squash requires a longer growing season compared to summer squash and should be planted earlier. For example:
- Winter Squash: Sow seeds directly into the ground at least one week after the last frost date.
- Summer Squash: Plant anytime after the last spring frost, as they require less time to mature.
Dealing with a colder region?
Gardeners can start seeds indoors 2-4 weeks before the last expected frost date to extend the growing season.
Regular monitoring of weather forecasts ensures that outdoor transplanting aligns with suitable conditions conducive to growth.
Soil Preparation and Requirements
Ensuring soil is adequately prepared is a cornerstone of successful squash gardening. Specific soil pH levels and nutrient profiles, paired with excellent soil structure, are fundamental for optimal squash growth.
Soil pH and Nutrient Balancing
The ideal soil pH for squash plants ranges between 6.0 to 7.0.
Gardeners should use a pH meter to test the soil, as this acidity level ensures the best nutrient uptake.
To balance the soil’s nutrients properly, they may need to incorporate amendments like:
- Lime to raise soil pH.
- Sulfur to lower soil pH.
Nutrient-wise, squash plants benefit from a soil rich in nitrogen, phosphorus, and potassium.
It’s advisable to conduct a soil test to determine the exact nutrient needs and then add organic compost or a balanced fertilizer to meet these requirements.
Improving Soil Structure for Squash
Squash plants flourish in well-drained, fertile soil.
Improving soil structure can be achieved by:
- Adding organic matter such as compost or aged manure to enhance fertility and drainage.
- Ensuring the soil is aerated properly, which encourages root growth and improves water infiltration.
Squash Planting Techniques
Successful cultivation of squash begins with choosing robust seeds and understanding the importance of planting depth and spacing. These foundational steps are crucial for a bountiful squash harvest.
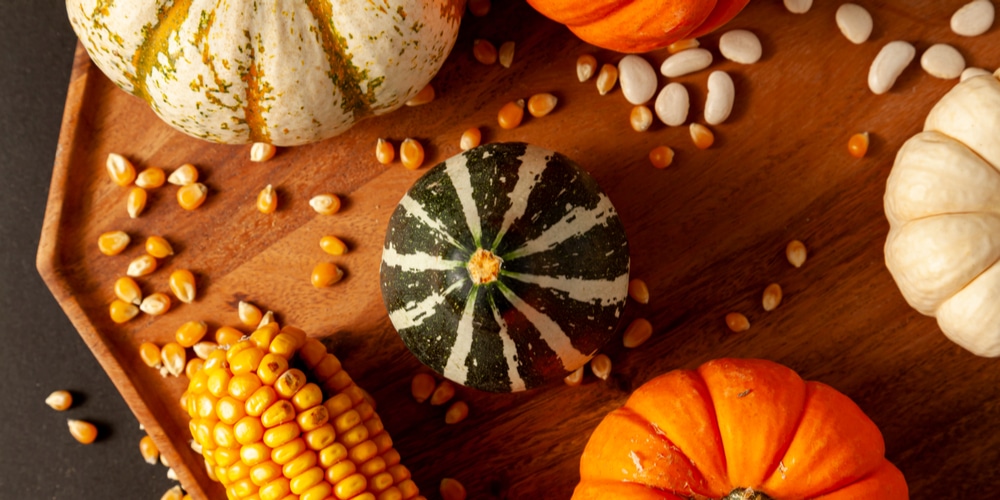
Seed Selection and Germination
Selecting high-quality seeds is the first step towards a fruitful squash garden.
One should opt for seeds that are disease-resistant and well-suited to their local climate.
For germination, it’s beneficial to start seeds indoors if the growing season is short.
Adequate warmth is critical for seed germination; thus, maintaining soil temperatures between 70 to 95°F (21 to 35°C) can accelerate the process.
For best results, one could place seed trays on a heating mat to ensure consistent temperatures.
Upon sprouting, the seedlings require ample light, so providing a grow light may be necessary to prevent legginess.
Spacing and Depth for Planting
When transplanting squash outdoors or planting seeds directly into the garden, keen attention to spacing and depth is vital.
Squash plants vary in size, but as a general rule:
- Vining squash should be planted about 8-12 feet apart.
- Bush varieties need a spacing of about 3-4 feet to accommodate their growth.
For depth, seeds should be sown 1 inch deep into the soil.
Proper spacing allows for adequate airflow around the plants, reducing the risk of disease, while the recommended depth ensures the seeds have enough coverage to retain moisture without being so deep that they struggle to emerge.
Caring for Squash Plants
Maintaining a healthy squash plant involves regular watering and fertilization, along with vigilance against pests and diseases. These practices are essential for yielding a bountiful harvest.
Watering and Fertilization
Squash plants require consistent moisture, especially when they are flowering and developing fruit.
Gardeners should provide one inch of water per week, applying it directly to the base to minimize leaf wetness, which can lead to fungal diseases.
A slow, deep watering method is recommended to ensure that moisture reaches the roots.
Fertilization should be timed to coincide with key stages in the plant’s development:
- After Planting: Initially, a balanced 10-10-10 fertilizer can encourage good root and foliage development.
- Flowering and Fruit Set: Switch to a lower nitrogen and higher potassium fertilizer to promote fruit growth and maturity.
Pest and Disease Management
Pests such as squash bugs, vine borers, and cucumber beetles pose a threat to squash plants.
Regular inspection of leaves and vines can help in early identification and control.
One may use insecticidal soaps or neem oil as an organic approach to pest management.
Disease management revolves around preventative measures, such as:
- Crop Rotation: Avoid planting squash in the same area year after year.
- Sanitation: Keeping the area free of debris and diseased plant material helps prevent the spread of pathogens.
- Proper Spacing: Ensuring adequate space between plants improves air circulation and reduces fungal infections.
Harvesting and Storing Squash
The successful storage of squash begins with correct harvesting techniques. Choosing the right time to harvest and employing appropriate storage methods are critical to preserving squash at its peak quality.
Signs of Squash Maturity
Winter Squash: One can identify mature winter squash by checking the skin’s hardness and the color’s depth.
For most varieties, a mature squash will have a tough outer skin that resists puncture when pressed with a fingernail. The stem should also start to wither, and the color should be vivid and uniform.
It’s advised to cut the squash from the vine with sharp shears, leaving at least an inch of stem.
Summer Squash: These varieties should be harvested when they are still tender and relatively small in size, usually no more than six to eight inches long.
The rinds should be glossy, and the squash should feel firm.
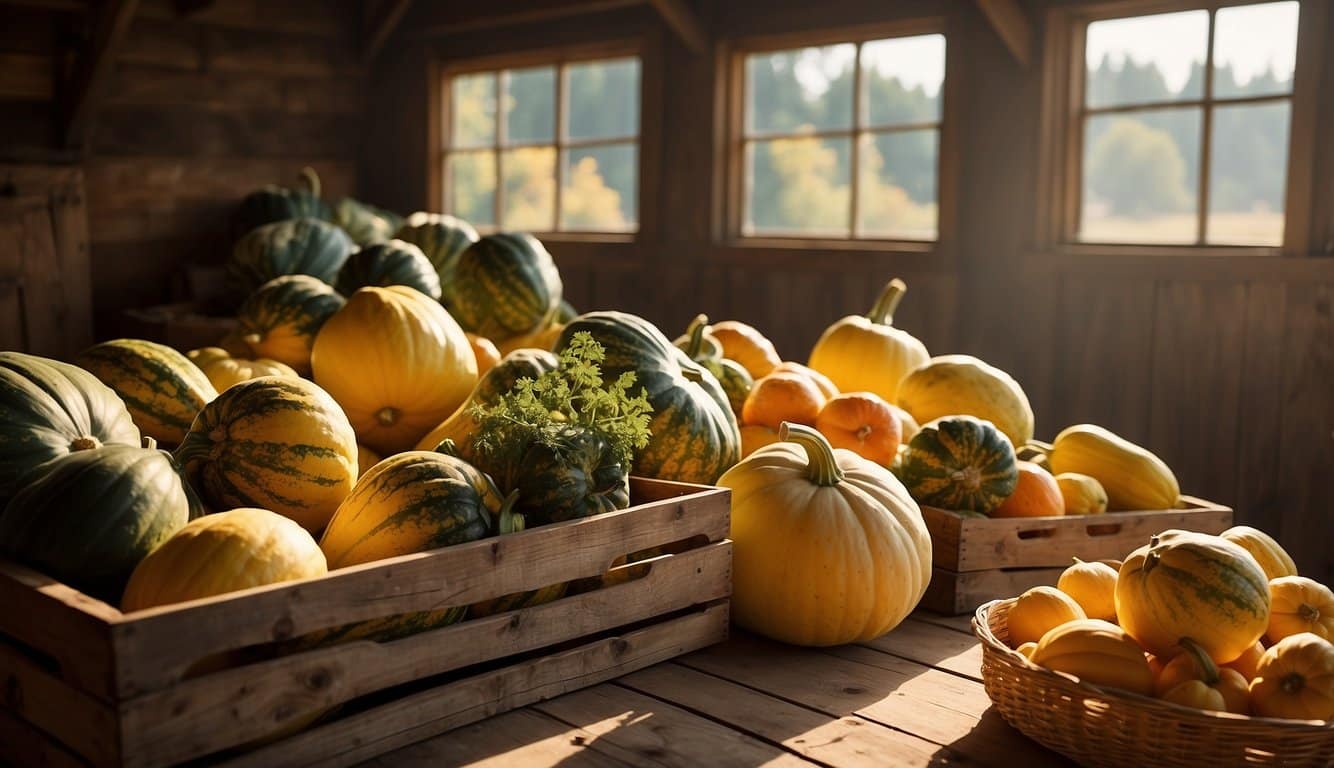
Preservation Methods for Squash
Winter Squash: Winter squash benefits from a curing period. Place freshly harvested squash in a warm, dry location (about 80-85°F) with good air circulation for approximately ten days.
After curing, store squash in a cool, dark place, ideally around 50-55°F. If stored well, winter squash can maintain its quality for several months.
Summer Squash: Unlike winter squash, summer squash does not require curing.
They should be consumed relatively soon after harvesting or can be stored in the refrigerator for up to a week.
For long-term preservation, one can freeze summer squash after blanching it to maintain its texture and flavor.
Frequently Asked Questions
In this section, readers will find answers to common concerns regarding the timing and techniques of planting squash for a fruitful harvest.
How long does it take for squash to grow from seed?
Typically, squash takes about 60 days to mature from the time of seeding. However, the duration may vary slightly depending on the variety and growing conditions.
What is the optimal spacing when planting squash in rows?
For squash plants grown in rows, the ideal spacing is to place seeds or seedlings 36 inches apart in all directions. This spacing ensures sufficient airflow and room for growth.
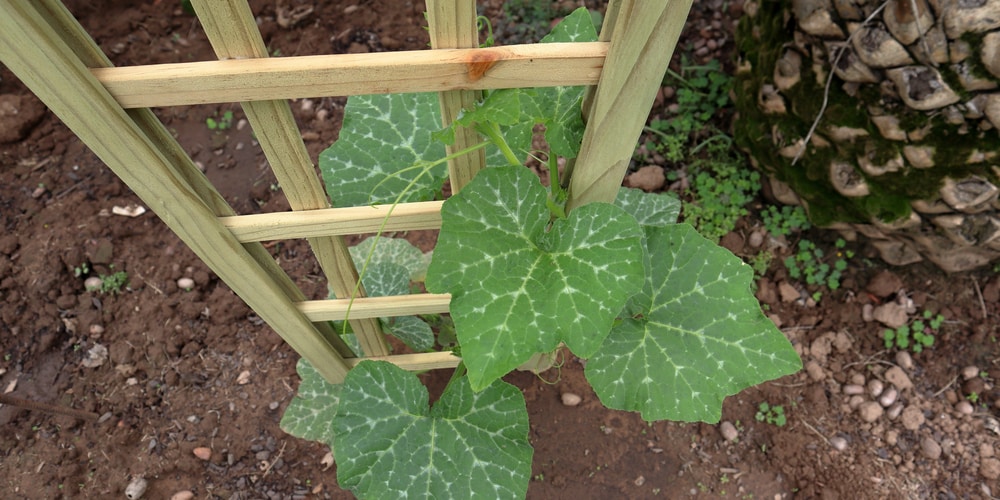
Which methods are effective for growing squash vertically?
To grow squash vertically, gardeners can use trellises, cages, or stakes. Training the vines to climb these structures can save space and reduce the likelihood of pest infestations and diseases.
Can squash be successfully grown in containers, and if so, how?
Squash can thrive in containers as long as they have enough room. A container with a 24-inch diameter is suitable for most squash varieties. Ensure proper drainage and consistent watering for best results.
What are the step-by-step instructions for planting squash?
The fundamental steps for planting squash include: selecting a sunny location, preparing the soil with compost, sowing seeds to a depth of 1 inch, watering consistently, and thinning seedlings to the recommended spacing once germinated.
What agricultural practices can enhance the yield of squash crops?
Regular watering, especially when the plants are large and fruiting, is crucial.
Applying mulch helps retain soil moisture and control weeds.
Adequate fertilizer, based on a soil test, can also significantly enhance yield.
Last update on 2025-06-06 / Affiliate links / Images from Amazon Product Advertising API