Are you thinking of moving your redbud tree to another location for landscaping purposes or tree health concerns? Your Cercis canadensis may not take too kindly to the move and will seriously weaken if transplanted at the wrong time.
It’s definitely possible to transplant a redbud tree successfully, as long as you follow several rules and guidelines. Here’s when and how to transplant a redbud tree.
Can You Transplant Redbud?

In theory, you should be able to transplant redbud trees from one location to another. However, you will have to account for transplant shock, the tree’s age and the amount of work needed to get the job done.
Generally, younger trees and saplings are much easier and have a higher chance of undergoing a successful transplant. This is because they’re smaller (and easier to manage) and their roots haven’t spread out as much compared to a mature specimen.
Transplanting a bare root redbud or one that’s just arrived from a nursery or garden store is perhaps the easiest of all, but you’ll still have to time it right and prepare for it.
When Should You Transplant Redbud Trees?
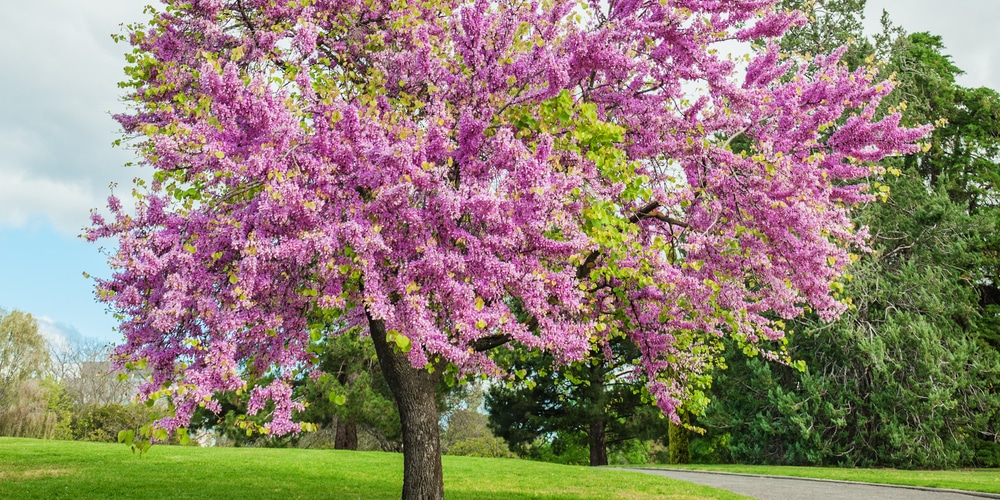
The best time to transplant redbuds is either spring or fall season. You’ll want the ground to be pliable as you would need to do some significant digging.
Transplanting in spring allows the environment to warm up to encourage new growth, while a fall transplant gives the redbud tree time to establish and set down roots. As for the time of day, it’s recommended that you transplant in the late afternoon to early evening to reduce shock as much as possible.
How to Transplant a Redbud Tree
Choose the New Location
Ideally, you should already have a new location in mind when you’re transplanting a redbud tree. Cercis canadensis is best situated in an area that gets full sun to partial shade and in well-draining and constantly moist soil. Proper air circulation is also important so the tree won’t acquire fungal diseases.
Water Before Transplanting
Prepare your redbud by watering it well three to five days prior to the move. You can use drip irrigation to thoroughly soak the root area so your tree gets a nice drink. Doing so reduces the shock when you root-prune the plant and dig it out of its home.
Root Prune the Redbud
Root pruning is the process of removing excess roots and leaving out only the main shoots. This encourages regrowth and makes digging and moving easier.
To start, make a circle that has a spacing of around 15 inches around the redbud’s trunk, then dig straight down about 24 inches. Use a spade to get around the rootball area and make sure to loosen the main roots as you see them.
Once the redbud tree’s roots are loose, turn your attention to the planting spot. Use a spade to dig a hole roughly three times the size of the rootball, but keep the same depth. Scrape the sides with a gardening hoe so the redbud can penetrate easier.
Move the Redbud Tree to the New Location
Carefully move the redbud to its new location and set it down the hole. Remove grass, weeds, and similar debris before backfilling, or putting the soil back on the ground. At this point, you can amend the medium with organic compost to enrich the soil. It’s also recommended that you put some of the soil that was in the original spot to make acclimatizing easier.
Fill the hole with soil and tamp lightly around the base so the roots make contact with it. Make sure the hole is completely filled up so it won’t come loose later and shift the tree.
Mulch and Water
Once the redbud is secure in its new location, it’s time to mulch and water. You can apply a three-inch layer of wood chip mulch around the tree but not directly on the trunk.
Then, do slow-drip irrigation using a water hose situated near the base of the redbud. Open the tap and allow water to pour in and through the newly transplanted tree until it forms a puddle. Do this twice or even thrice per week if the weather is hot and there’s no rainfall. Observe for signs of growth and ease off on the watering to just once a week.