Timing is crucial when it comes to introducing new plants to your garden. The same can be said if you’re looking to get a low-maintenance variety such as the creeping phlox. Before doing anything though, you’d need to know when to plant creeping phlox for your garden to flourish.
Here’s our short guide on the best time to plant creeping phlox and how to care for them.
When to Plant Creeping Phlox?

Creeping Phlox, otherwise known as star rock phlox and moss phlox, is best introduced into the garden as a cutting or transplant. Once established, this phlox variety will readily seed itself and spread throughout its confines and where you allow them.
Plant your creeping phlox either in spring or in the fall season. If you intend to plant in spring, wait until all risk of frost has passed. In fall, you should plant creeping phlox about a month before the first frost in your region arrives.
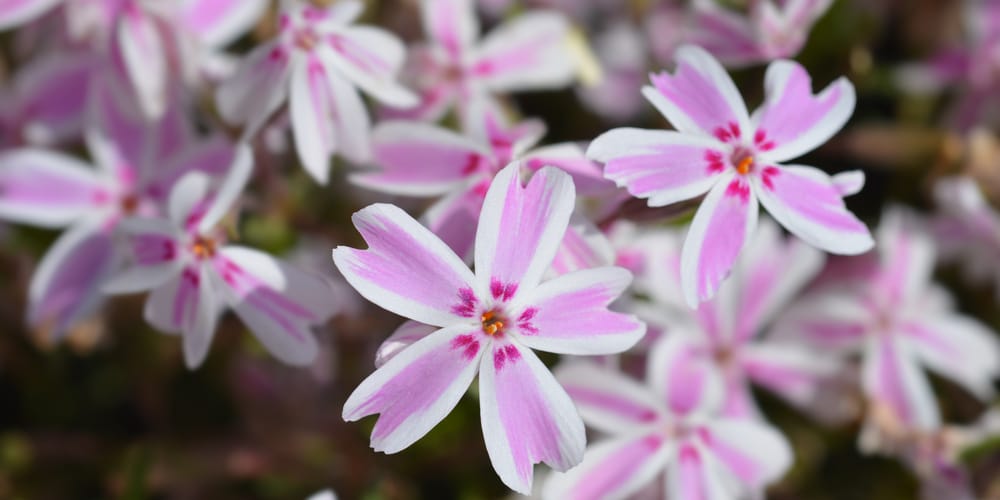
You’ll have several color choices to add to your landscape when planting Creeping Phlox. For a deep purple shade, opt for ‘Fran’s Purple’, while bright pink blooms are exclusive to the ‘Home Fires’ and ‘Pink Ridge’ variety. To add blue-purple flowers it’s recommended that you plant ‘Sherwood Purple’. Lastly, ‘Candy Stripe’ gives your landscape a sea of pink and white.
Regardless of variety, most creeping phlox plants will prefer a site that gets full sun or partial shade. Generally speaking, phlox will want anywhere between four to eight hours of sunlight to produce a sea of inch-long flowers.
How to Plant Creeping Phlox

Phlox stolonifera has several uses in the yard or garden. It’s primarily designated as a ground cover and used in tight spaces, as well as backdrops with taller plant varieties. The low-maintenance plant can fill any gap and perform as needed with little to no extra care.
The colorful, star-shaped flowers bloom in mid-spring to late summer and produce a fragrance unlike any other. However, you’ll want to keep the phlox’s space pure and eliminate any grass or weeds that may come up.
The Creeping Phlox prefers constantly moist and nutrient-rich soil. Before planting, you can till the top layer and amend it with loam and aged compost. Seedlings and starts can be spaced at around 14 to 24 inches apart from each other so they won’t overlap. Since they grow so quickly the spaces will disappear sooner than you’d think.
Dig a hole that’s twice the size of the pot or container it came with. Make sure that the top of the creeping phlox’s root ball is level with the soil surface. Then, fill up the space with the soil and water the plant thoroughly. Remember to irrigate often early and during the growing season so the plant will grow a strong root system.
Other than that, you can let the creeping phlox grow on its own and supplement with occasional watering. You’ll soon see a prolific bloom when the environment is conducive to phlox growth.
How to Care for Creeping Phlox
Fast-growing plants will usually need regular pruning, but this is not the case with Creeping Phlox. Generally, you wouldn’t need to do a hard prune, but it would be nice to cut back the foliage to keep a neat shape and growing habit. This practice will encourage the creeping phlox to produce side shoots and make it bushier in the long run. You can also deadhead the flowers so the plant can focus on producing more buds.
Feed your creeping phlox in spring to support foliage and flower formation. A slow-release fertilizer with a balanced formula should work well. Alternatively, you can fertilize using a liquid or granular fertilizer and in the same recommended period.
Creeping phlox tends to do well in USDA zones 5 through 9. In regions that experience temperatures below 40 degrees F, protection might be needed to avoid cold damage.
This vigorous plant readily re-seeds, but you can propagate by division if you want more creeping phlox specimens. To do this, gently dig up the whole plant and keep the root ball intact. Dislodge excess soil and dirt to see the roots clearly, then use either a sharp knife or spade to separate a single ball into two or several more (depending on the size).