Okra is a plant native to Egypt and Ethiopia that (as you may expect) thrives in warm weather. These plants are nutritious and rich in protein, vitamins, and fibers. In some cultures, including the Indian and the Creole, people use it to thicken soups or stews.
Besides being the ideal addition to vegetable gardens in the southern regions of the United States, okra also makes for an excellent decorative plant. Indeed, this plant displays beautiful flowers that resemble hibiscus.
And the best part is that (under the ideal climate and weather conditions), growing okra isn’t particularly challenging. Plus, you’ll get plenty of harvests during the hot season. But how do you know when okra is ready to pick? Keep reading this essential guide if you want to find out!
When Should You Harvest Okra?

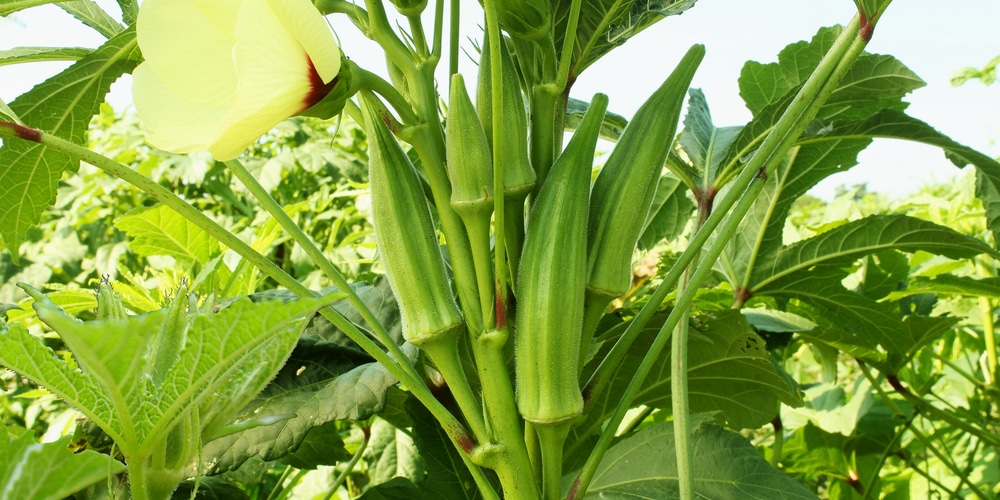
If you do everything the way you should with okra, your plant will grow fast. The best way to know when your okra is ready is to check for the presence of pods. Okra will display them a few days after flowering.
Once you notice them, keep an eye on your plants: you can harvest them as soon as the pods reach about three inches in length. You should pick the pods before they become tough and woody, which can happen in a few days. So, don’t forget to check your plant often after its flowers.
Keep harvesting to encourage your plant to produce more flowers (and fruits).
You can expect okra to be ready about two months after planting. If you don’t want to get this wrong, you can test the bigger-sized pod with a knife: it should be firm but not hard.
Remember that the softer the okra, the more digestible it will be. Toss those that come from compact stems to avoid any issues.
After you harvest okra, store the pods in plastic bags inside the fridge: it will help increase their shelf life. If you are not planning to consume them within a week, you might be better off freezing them.
How To Harvest Okra: when is okra ready to pick
When you know how to recognize when your okra is ready, harvesting it isn’t too complicated. Still, it requires you to handle the veggies carefully. Cut them with a knife from the stem below the pod.
Do so without hesitation to avoid stressing or harming your plant. But don’t forget to leave a couple of pods: they will help your plant with self-pollination, meaning you’ll be able to enjoy your plant’s fruits even the following year.
However, keep in mind that you should do so after harvesting your plant. Indeed, leaving fruits on it will slow down the development of new pods.
Consider wearing gloves when handling the pods: it will prevent skin irritation that the many spines in the plant might cause.
Such a measure will be unnecessary if you plant spineless types. Some examples of varieties without thorns include “Blondy” and “Louisiana Green Velvet, ” but don’t be afraid to experiment with others.
How to Grow Okra: Our Tips
Sow their seeds three to four weeks before the last frost date to get the most out of your okra plants. That might depend on where you live, so don’t forget to check the local weather and look for your region’s average frost date.
Okra loves the heat, but you’ll have to keep them moist to ensure they stay healthy. Consider adding a thick layer of mulch around your plants. Doing so will improve drainage, increase water retention, keep weeds at bay, and even increase the soil’s nutrient content.
If you feel your plant lacks nutrition, you can apply a balanced liquid fertilizer, better if slow release. Don’t forget to avoid products high in nitrogen: the result will be a leafy plant without many fruits.
To encourage healthy growth, ensure you follow a regular watering schedule. Usually, one inch of water per week should be sufficient.
However, you may have to adjust the amount of moisture you add to your plants depending on your local climate.
If you live in a hot and arid region, you’ll have to add more water. But to avoid making mistakes, we recommend you feel the soil with your fingers: if it isn’t dry, wait for a couple of days before adding more moisture.
Related Article: Okra Seedling: Grow Stages