If you’re looking for an easy way to propagate umbrella plants, look no further! This guide will walk you through the simple steps of propagating these beautiful plants. Umbrella plants are a great addition to any yard and are very easy to care for. With just a few simple steps, you can have new plants growing in no time using our Umbrella Plant propagation tips!
Why Is Propagating Important?

For many gardeners, propagating is an essential part of their gardening routine. Propagating is the process of taking cuttings from existing plants and growing new plants from them. This can be done with various plants, including trees, shrubs, and herbaceous perennials. There are several reasons why propagating is so essential.
First, it allows gardeners to create new plants without buying them from a nursery.
Second, it provides a way to clone favorite plants, ensuring they retain their desired characteristics.
Finally, propagating can help increase the diversity of a garden, as it allows for introducing new plant varieties. Whether you’re looking to save money, create duplicates of your favorite plants, or add some new variety to your garden, propagating is a great way to do it.
Umbrella Plant Propegation?
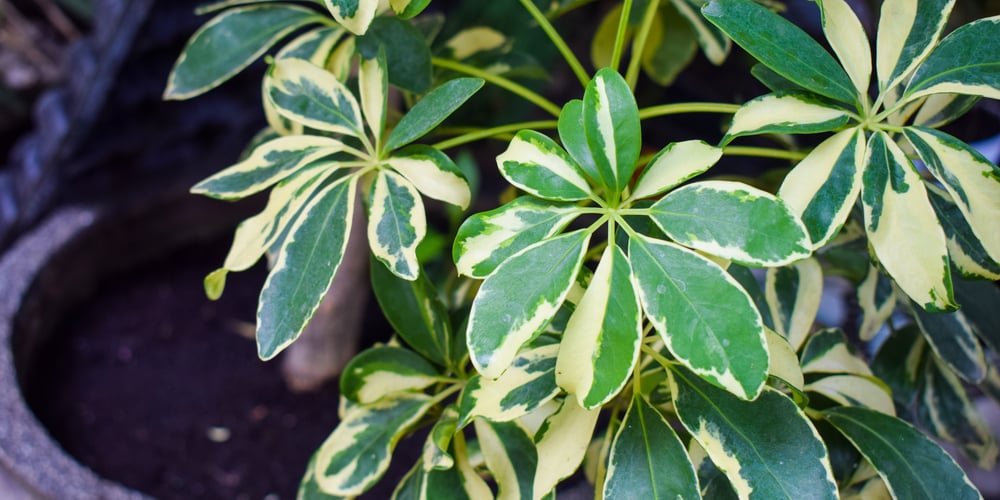
Many people are familiar with umbrella plants. These popular houseplants are easy to care for and make a beautiful addition to any indoor space. But did you know that umbrella plants can also be propagated at home? Propagating umbrella plants is a relatively simple process that can be achieved by stem cuttings and seeds.
Propagating By Stem Cuttings
One of the easiest ways to propagate umbrella plants is by stem cuttings.
Step 1
Preparing the soil is vital in ensuring that your plants have a strong foundation to grow. One way to prepare the soil is to dampen it thoroughly and mix it with your hands until there are no dry spots.
Another way to prepare the soil is to add vermiculite to a standard houseplant potting mix. Vermiculite helps hold moisture and prevents compaction, allowing roots to penetrate the soil more easily. Whatever method you choose, properly preparing the soil will help ensure that your plants have the best chance of thriving.
Step 2
There are a few things to remember when choosing a cutting tool:
- You’ll want to make sure the blade is sharp. A dull blade will crush the stem, making it more difficult for the cutting to take root.
- You’ll want to choose a sterilized instrument. This will help to avoid spreading pathogens to the cutting. Isopropyl (rubbing) alcohol is a great sterilizing agent.
- You’ll want to choose a tool that cuts cleanly.
Scissors can work in a pinch, but a propagation or grafting knife is ideal. Bypass pruners also work well.
Step 3
To take a cutting from a plant:
- Cut a four- to six-inch section from the stem just above a leaf node, preferably at the tip. The stem size should be at least the diameter of a pencil.
- Make a straight cut to speed callusing and minimize the potential area of pathogen invasion.
- Wrap in a damp paper or tissue towel and place in a plastic bag until ready to plant.
Step 4
Place the cutting around the soil, and keep it in a location with bright indirect light. New roots will begin to grow in one to two weeks, and once the cutting has developed a good root system, it can be transplanted into a pot or outdoors. Plants grown from cuttings will be identical to the parent plant.
Step 5
Water lightly to keep the soil moist but not soggy. Too much water can cause the cutting to rot before it has a chance to take root.
Propagating By Seeds
Sowing seeds is usually not worth the time and effort for the average gardener. Many seeds must be stratified, meaning they require a period of cold dormancy to germinate. This can be difficult to replicate at home, so seedlings often fail to emerge. On the other hand, cuttings are much easier to root and grow into healthy plants. However, it can still be done.
To propagate an umbrella plant by seed, the first step is to collect the seed heads. Once they are dry, the seeds can be removed and sown in a pot filled with moist sand or peat. The pot should be placed in a warm, sunny spot, and the sand should be moist but not wet.
After a few weeks, the seeds will germinate, and small seedlings will appear. At this point, the seedlings can be transplanted into individual pots filled with soil. Once established, the umbrella plants can be moved outdoors to a sunny location.
Umbrella Plant Propagation: Conclusion
Now that you know how to propagate umbrella plants, you can start growing your plants at home! Propagating by stem cuttings is the easiest and most reliable method, but propagating by seed is also possible.
Whichever method you choose, prepare the soil properly and monitor water levels. With a little care and patience, you can grow healthy umbrella plants that will thrive for years.