Adding houseplants is one of the most effective ways to improve the atmosphere or create a sense of comfort in a home. The spider plant is a popular indoor plant. Putting the plant in a basket and placing it on your window lets the plants’ leaves hang elegantly over it, brightening up a dull kitchen or living room.
The spider plant tends to overgrow, necessitating proper maintenance to stay healthy and vibrant. Continue reading the article to learn more about how to trim spider plants.
When To Trim Spider Plant

If your spider plant needs trimming, the ideal time to do so is either late in the autumn or early in the spring, before the plant’s active growth season. Nevertheless, you can still do it any other time if need be. In case you find unhealthy tissues, it’s advisable to trim them right away, regardless of the season.
How To Trim a Spider Plant
Follow the steps below when trimming a spider plant.
Step 1: Select the Right Shears
The trimming shears you use must not be blunt too quickly. When removing unwanted leaves from the plant’s base, blunt shears might cause harm or uprooting. You’ll need to disinfect the shears so that you do not unintentionally introduce germs to your spider plant. Other essential things you should have include:
- Household cleanser
- Container with soil
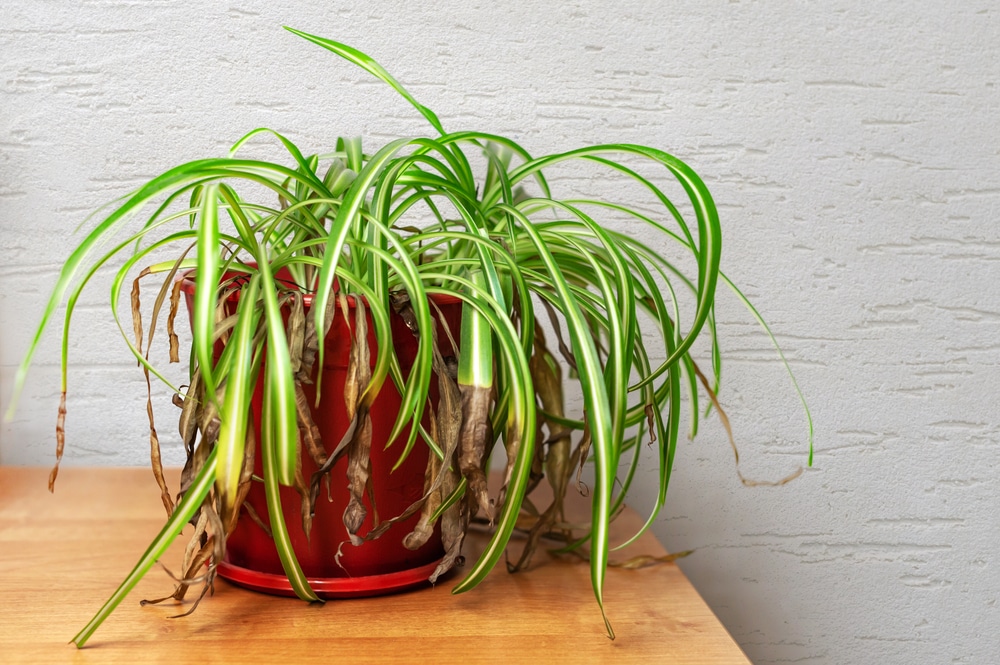
Step 2: Remove All Yellow or Brown Leaves
Check your plant to see whether there are any browning or yellowing leaves. These are signs of dead plants or a disease attacking your plant. Remove the leaves from your plant’s base using sterile shears. It is best to avoid removing just the yellow area of the leaf because it will end up opening a wound on the leaf.
Overexposure to sunlight might be why your plant has yellow and brown leaves. Transfer the plant to where it will receive between 4 and 6 hours of daylight.
The problem might also result from tap water containing excess chlorine or fluoride. Thus, it’s a good idea to try filtering the water.
Step 3: Remove Any Unnecessary Leaves
Spider plants often become unmanageable, and their leaves spread out in every possible direction. The leaves can get up to 12 inches long. The plant’s width also grows to 30 centimeters, enough to fill the space.
If the plant is starting to outgrow the space it occupies, you’ll need to trim away the excess leaves at its base. You should repot the plant into a larger container if you want it to maintain its overgrown appearance.
Step 4: Trim Root-Bound Plants
Becoming root-bound indicates that your plant’s roots have eaten all the available space within the container, inhibiting further growth. It’s the initial sign that your plant needs some trimming.
To prevent the plant from becoming unmanageable, trim the top and each side of the base. Rather than pulling on the spider plant, turn over the container and let it unhook naturally. After detaching your plant from the soil, inspect for and get rid of any dead roots.
Then, replant it after filling the container with soil and the appropriate nutrient-rich fertilizer. Wet the ground and shield it from direct sunshine.
Step 5: Perform a Routine Trimming in the Spring
If your plant is between 2 and 3 feet tall, you should think about trimming it once a year. You might go several years without trimming if you do it well. In case your plant produces many leaves, you must consider performing root trimming once every two years.
Final Thoughts
You must understand spider plants’ growing conditions to perform the proper trimming. Determine when you need to get rid of the baby shrubs sprouting all over the plant’s base. Also, know when your tree has gotten too big and needs some trimming.
Get everything you need and trim your plant under the sun for adequate lighting. Now that you have this advice on how to trim spider plants, caring for your houseplant shouldn’t be difficult.