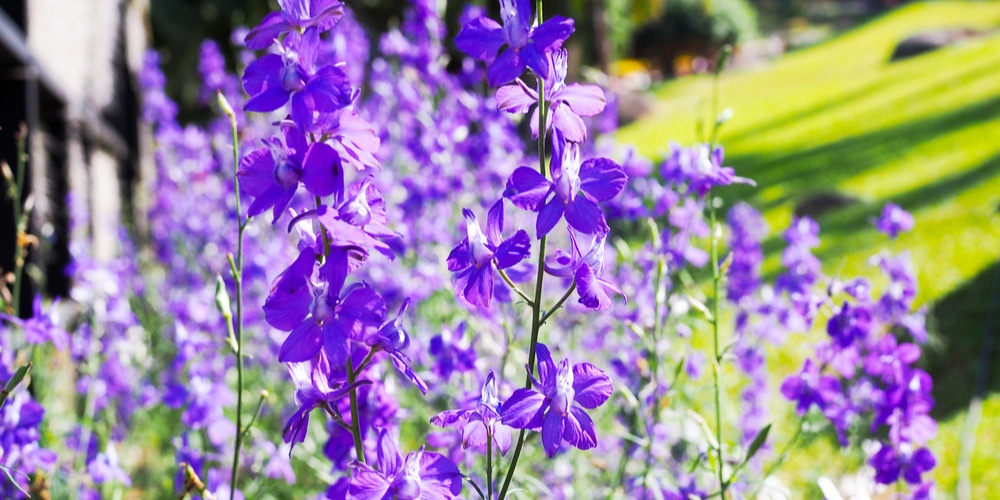
Lobelia is the perfect border plant around your garden because they’re so dramatic. The bright colors and pretty shapes cascading around your garden’s edge (or from a hanging basket, which these flowers are also well-suited to) make for a beautiful focal point in any garden. But knowing how the process for lobelia growing from seed is important, so you get the results you want. And that’s why we’re on hand to help today!
When Is The Best Time Of Year To Plant Lobelia?

The thing about lobelia is they’re much hardier than their delicate flowers, and beautiful colors make it seem. So long as there isn’t snow on the ground when you plant, you should be able to scatter them on the soil and get results. After all, they’re good at growing in almost any climate.
But as we all know, this is never a guaranteed route to success, so for lobelia growing from seed, it’s usually a better idea to control the process with seeding trays. And to do it, we’ve put together this handy step-by-step guide below!
Planting Lobelia: Step By Step
Step One: Sowing
When you open the lobelia seed packet, you’ll notice they’re pretty small, so handle them with care because scattering these across the floor is a nightmare. Trust us, we know.
Take your seeding trays and fill them most of the way to the top using vermiculite growing soil. As a sterile soil, this means you’ll be able to move the seedlings later on without damaging the roots, so make sure you stick to this soil advice.
Scatter your seeds on top, and then finish the seeding tray by topping it with more vermiculite soil. Gently pat down the top surface to remove any air pockets that may have formed. Only pat down gently, though, as compact soil will reduce oxygen and water flow to the seeds and stunt growth.
Step Two: Germinating
To germinate the seeds into seedlings, the process will take around three weeks. This can be done indoors, so long as temperatures in your home are cool to moderate. Too cold and they’ll suffer, and the same if it’s too hot. So find a cool space in your home that doesn’t have too much temperature fluctuation.
Unlike other seeds, lobelia does not like a lot of water but does like moisture. To help them germinate into seedlings, you’ll need to mist the soil, not water it, every day. Just enough to see the color change in the ground is fine. Too much water and the seeds will soak and struggle to grow.
After three weeks, the seedlings will form and, from this point, they’ll need light. You can place them on a windowsill to get filtered sunlight if you prefer the natural approach or opt for moderate grow lights.
Step Three: Potting
It’s difficult to say how long it will take for your seedlings to be ready for potting, but you’re looking for a growth of around 2 inches or so. After this point, they’re ready to be moved to a pot.
But getting to this stage will require regular maintenance on your part. As the lobelia grows, you’ll notice some seedlings in the pot are smaller and weaker, and you’ll need to pluck them. Failure to do so will result in the larger seedlings not being able to perform as well and stay healthy, so make sure you keep on top of this.
When you have a few 2-inch lobelia seedlings, transport them from their seedling tray to a small, 2-inch growing pot. From here, you continue misting the soil daily and placing them beneath their growing lights or where they can get filtered sunlight as before. Keep doing this until they reach around 4 inches.
Step Four: Hardening
Once they’ve reached 4 inches tall, it’s safe to say your lobelia plants are doing well and are nearly ready to be planted outdoors. However, you don’t want to plant them right away, shock them, and ultimately kill them. So you’ll need to go through the hardening process.
We mentioned earlier that lobelia is quite hardy plants, so hardening them isn’t as important as it is with other species. However, it’s still an excellent habit to get into when growing anything from seed, and it’ll just give your lobelia the best chance of surviving when you move them outdoors full time.
All you need to do is take them outside for a small amount of time each day to harden them. On the first day of hardening, this might only be for an hour in the shade. Then bring them back inside.
The next day might be for an hour more. The next for 3 hours total. Maybe then you move them into direct sunlight for a bit. Just keep gradually increasing the amount of time they’re outside and the amount of direct sunlight they get each day over a 2-week period until eventually they can be left outside in the sun all day in their pots.
Once they’ve reached this stage, you’re ready for the last step in today’s guide!
Step Five: Transplanting
Now all that’s left to do is plant them outside. Make sure there’s no risk of frost, and then you’re good to go.
Lobelia plants will need at least 4 inches between them when planting them outside, but some will require more, so look at your specific species before you decide where to put them.
Water them once a week with 1 inch of water, and put mulch over the soil to keep moisture. Remember, lobelia like moisture, not so much water, and drying out is the number one killer of lobelia.
How to Grow Lobelia From Seed: Final Takeaway
Lobelia growing from seed isn’t a particularly hard task, but it requires a little know-how. Stick to our guide today, though, and your borders will soon be lined with beautiful lobelia flowers that you’ve grown yourself from seed!
Related Article: Do Deer Like Lobelia?