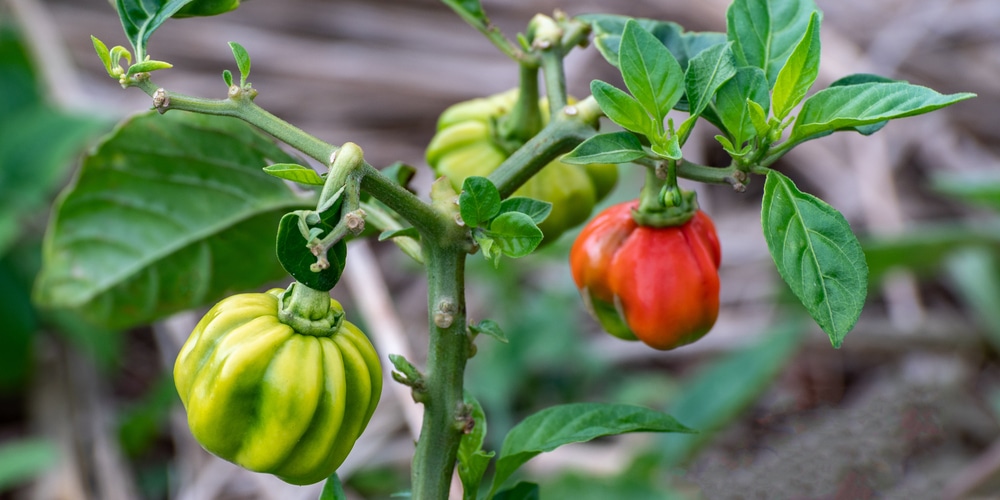
The Scotch bonnet pepper is a small, spherical chili pepper that is native to the Caribbean. It is closely related to the habanero and packs a similarly fiery punch, with a Scoville rating of 100,000-350,000.
The peppers are traditionally used in Jamaican cuisine, where they are used to add heat to dishes such as jerk chicken and curried goat. The peppers can also be pickled or made into hot sauce.
If you’re a fan of spices and want to try your hand at growing your own Scotch bonnet peppers, read on for a step-by-step guide.
Growing Scotch Bonnet Peppers from Seed

Peppers are typically started from seed, as they are not easily transplanted. Unlike many other vegetables, peppers do not like to have their roots disturbed. There are different varieties of Scotch bonnet peppers, but growing them is generally the same across the board.
Fortunately, starting peppers from seed is not difficult. If you’re planning on growing your peppers indoors, here are some important tips:
Getting Ready: When to Plant
Timing is everything when it comes to planting your pepper seeds. Typically, they’re started indoors about six weeks before the last frost date in spring. This is true for most varieties of peppers, but check the specific variety that you’re growing for any exceptions.
You’ll also need to make sure that you have a sunny spot in your house for your pepper plants. A south-facing windowsill is ideal. If you don’t have one, you can also use grow lights.
What You’ll Need: Supplies
To get started, you’ll need some supplies. For planting, you’ll need soil, pots or seed cell trays, and seeds. It’s best to use a potting mix designed for seedlings, as it is light and airy and drains well. Peppers like to stay moist but not wet, so make sure your pot has drainage holes.
Quality seeds also make a big difference. You can get these from a garden center or online. If you know someone who grows peppers, you can also ask for seeds from their plants.
As far as pots go, any size will do as long as it has drainage holes. Peat pots or cell packs work well and can be transplanted directly into the ground when it’s time to plant them outside.
Once you have your supplies, you’re ready to plant!
Planting the Seeds
Fill your pots with potting mix and moisten it with water. Use a spray bottle to avoid overwatering. Make a small indentation in the center of each pot and drop in two or three seeds. Gently press the seeds into the soil and cover them with a thin layer of soil.
Germination can take anywhere from seven to twelve days, so be patient. Once the seedlings emerge, you’ll need to thin them out. Use a sharp knife to cut away all but the strongest seedling in each pot.
As the plants grow, you may need to transplant them into larger pots. Wait until they have at least two sets of true leaves before you do this.
Transplanting Scotch Bonnet Peppers Outside
Once the last frost date has passed, it’s time to transplant your peppers outside. Choose a sunny spot in your garden and prepare the soil by loosening it with a hoe.
You’ll know when your scotch bonnet peppers are ready to transplant when they are about eight inches tall and have several sets of leaves. Additionally, do this when there are no dangers of frost. In short, the conditions should be just right.
To transplant your peppers, dig a hole that is twice as wide and just as deep as the pot. Gently remove the pepper plant from the pot and place it in the hole. Backfill with soil and water well. Remember to keep an eye on your peppers and water them regularly, especially during dry spells.
As you do this, the stems shouldn’t be buried too deeply. You want the first set of leaves to be just above the soil line.
Scotch bonnet peppers need sunlight, approximately six to eight hours per day. If you live in an area with long summer days, your peppers will do just fine in a sunny spot in your garden. If you live in an area with shorter days, you may need to supplement with grow lights.
Stake your plants if necessary. Peppers are top-heavy and may fall over as they grow and produce fruit.
Harvesting Scotch Bonnet Peppers
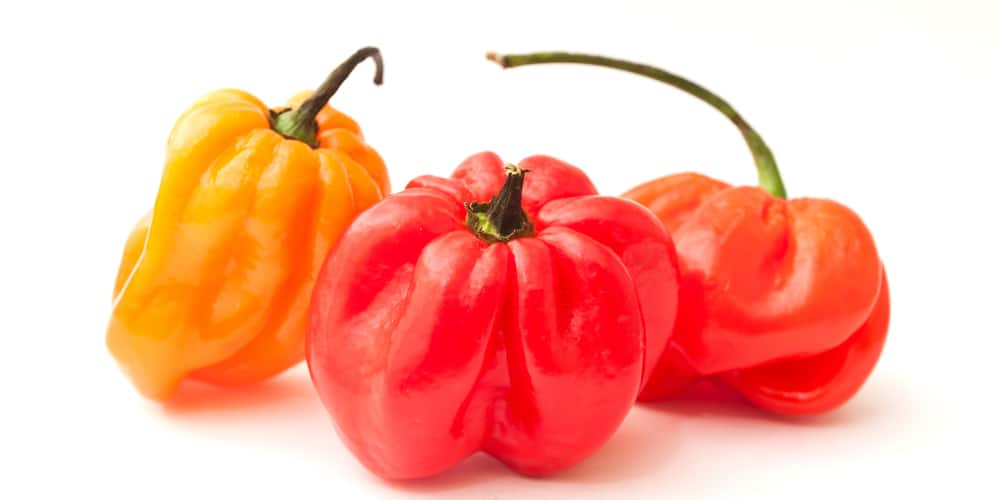
It takes approximately 3 months or 120 days for the scotch bonnet pepper to harvest – from seed to peppers. You’ll know they’re ready when the peppers are bright red or yellow and have reached their full size. If the peppers are still green, they’re not quite ready yet.
When the peppers are fully ripe, they will be very fragrant. It’ll have a distinct smell that you’ll be able to smell from afar.
Use gloves when harvesting the peppers, as they can cause skin irritation. Cut the peppers from the plant with a sharp knife, being careful not to damage the plant. Take care of your eyes, too – the peppers can cause them to tear up.
Once you’ve harvested your peppers, you can use them right away or store them for later. To store them, place the peppers in a paper bag and put them in the fridge. Peppers will keep for several weeks this way.
Growing Scotch Bonnet Peppers: Final Thoughts
Growing your own scotch bonnet peppers is a rewarding experience. Not only do you get to enjoy the delicious peppers, but you also get to watch the entire process – from seed to pepper – unfold before your eyes.