For many people, gardening is a therapeutic way to connect with nature and relax after a long day. Seeing your hard work pay off in the form of ornamental plants, flowering plants, fresh fruits, and vegetables is a feeling like no other. And for those who love Halloween, what could be more gratifying than growing your own pumpkins to carve?
As long as you start with a high-quality seed, have the right climate, and have an ideal space to grow, growing pumpkins is relatively easy. Typically, you’ll see pumpkins grown in the ground, but did you know that you can also grow them in raised beds?
Can You Grow Pumpkins in a Raised Bed?

Raised beds provide bountiful benefits for pumpkin growers. The additional drainage and soil aeration that raised beds offer help prevent pumpkin diseases such as powdery mildew and root rot.
Additionally, this extra space helps improve root growth, something that’s essential for healthy pumpkin plants. Pumpkins are vigorous growers and can quickly take over a garden, so the extra space raised beds provide is also beneficial in preventing them from crowding out other plants.
Soil Requirements for Growing Pumpkins
Before we get into the nitty-gritty of how to grow pumpkins in a raised bed, let’s talk about soil. Pumpkins are heavy feeders and require nutrient-rich soil to flourish. If your raised bed doesn’t have good drainage, you’ll need to mix some organic matter, such as compost, to improve aeration. It’s also a good idea to add a layer of mulch to help retain moisture and keep the roots cool.
Remember, your pumpkins heavily rely on their roots for nutrients. So if you want to have a bountiful harvest of fresh pumpkins, whether for cooking, eating or your Halloween jack-o’-lanterns, make sure to give them the best foundation by starting with high-quality soil.
Steps and Things You’ll Need to Grow Pumpkins in a Raised Bed
Now that we’ve gone over the basics of pumpkin growing in a raised bed, let’s get into the specifics! Here’s what you’ll need to get started:
- Pumpkin seeds
- High-quality potting soil
- Organic matter (compost or mulch)
- Raised bed
- Water
Step #1: Choose the Right Pumpkin Variety
Although all pumpkins are technically the same species, you’ll see that there are more varieties of pumpkins than you could ever imagine. So, how do you choose the right one for your raised bed?
The first step is to decide what you want to use your pumpkins for.
Generally, some plants can yield about three to ten pumpkins, so you’ll need to factor in how many you want or need. You also have to note that some varieties are better suited for adding in pie recipes, while others are better for jack-o’-lanterns.
When you’ll plant, and the type of care you’ll provide will also affect what variety you should choose.
For pies, you can choose from Baby Bear, Dickinson, or Sugar Pie. For carving, you can go with Howden, Connecticut Field, or Jack Be Little.
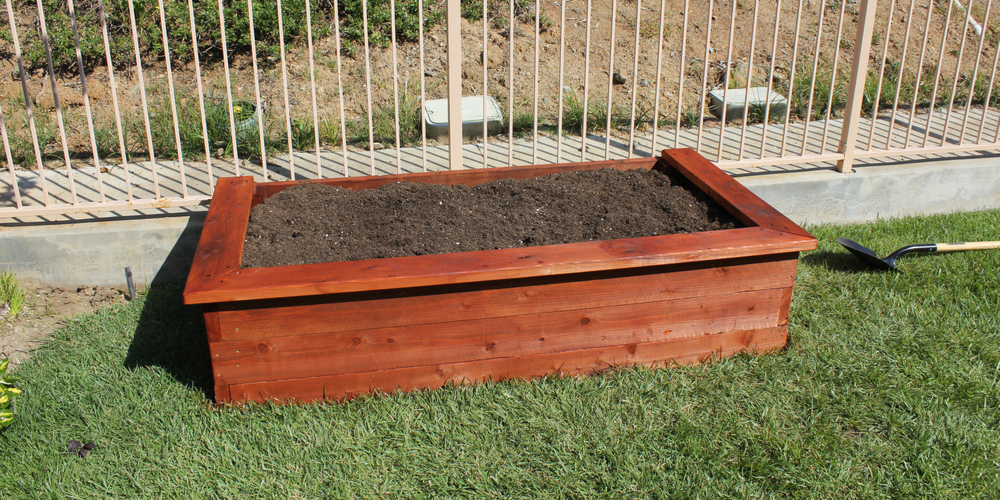
Step #2: Prepare Your Raised Bed
Now that you’ve chosen the right pumpkin variety, it’s time to prepare your raised bed!
Adding a layer of mulch, aerating the soil, and ensuring there’s good drainage is key to success. You should also add some organic matter to the soil to help improve its nutrient content.
It’s worth noting that pumpkins do well when exposed to full sun. With that being said, along with the soil preparation, you also have to make sure your raised beds are situated in an area that gets around 4-6 hours of sunlight every day.
As for the space, each plant should have about 4 square feet, and your raised bed needs to be 12 inches deep – this is ideal, especially if you’re short on space. You may go deeper, but 12 inches is the minimum.
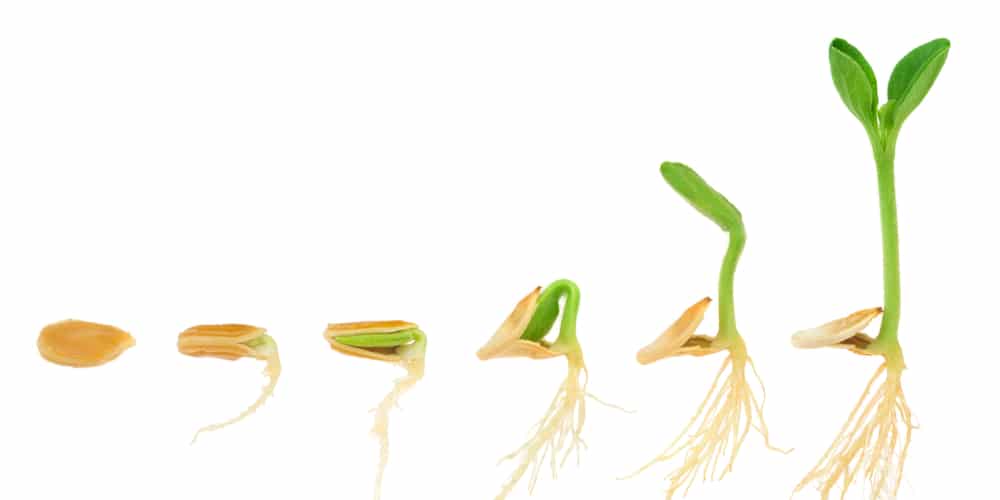
Step #3: Plant Your Pumpkin Seeds at the Right Time
After you’ve prepared your raised bed, it’s time to plant your pumpkin seeds! In most areas, pumpkins are best planted during the spring. If you have a greenhouse, you can start 4 weeks earlier, before the last frost.
Otherwise, if you don’t want to start indoors and want to get started in your beds immediately, you can do it 1 week prior to the last frost date.
Depending on the chosen pumpkin variety, you’d want to take into account the number of days to maturity. The average pumpkin takes about 90-120 days to mature. Check the back of your seeds packet to see how long your chosen variety takes.
Step #4: Water Regularly
This could be one of the trickiest parts – ensuring that your pumpkins get enough water.
Pumpkins need about an inch of water per week, particularly when they’re flowering and setting fruit. Too much or too little water can affect the quality and quantity of your pumpkin harvest.
Since you’re growing them in raised beds, you have to make sure the soil is moist but not waterlogged. The best way to know if your pumpkins need watering is to check the soil about an inch below the surface.
Dry soil an inch deep means it’s time to water.
If the soil is already moist, then you can wait a few days before checking again.
Overwatering can lead to disease and rot, so make sure to monitor the soil moisture levels.
Step #5: Use a Granular Fertilizer
While compost is a great way to add nutrients to your soil, using a granular fertilizer is also recommended.
Focus on using a fertilizer with high phosphorus and nitrogen. Nitrogen is essential for its leaves, and phosphorus is vital for blooming and fruiting.
Since they’re heavy feeders, you’ll want to fertilize your pumpkin patch once every seven to ten days.
Step #6: Monitor Throughout the Season
Your pumpkins need your care and attention throughout the season.
Monitor for pests and diseases, and make sure to address them immediately.
Carefully check for signs of stress. This could be anything from discoloration to wilting leaves and immediately take action to mitigate the problem. Don’t forget to carefully monitor the drainage too!
Can You Grow Pumpkins in a Raised Bed: Final Thoughts
Overall, growing pumpkins in raised beds is doable with the right preparation and care. Just remember to choose the right variety, prepare your beds, plant at the right time, water regularly, use a granular fertilizer, and monitor your plants throughout the season. With that being said, go ahead and give it a try!